How to Deploy Coolify on Hetzner and Secure it with Cloudflare Tunnel
A comprehensive guide to deploying Coolify on Hetzner Cloud and securing it with Cloudflare Tunnel, including SSH setup, domain configuration, and optional access control.
Coolify is a powerful, open-source alternative to platforms like Heroku and Netlify, allowing you to host your applications on your own infrastructure. In this comprehensive guide, we'll walk through setting up Coolify on a Hetzner Cloud server and securing it with Cloudflare Tunnel. This setup provides a robust, secure hosting environment with features like automatic HTTPS, zero-trust access control, and protection from direct attacks. Whether you're looking to host personal projects or business applications, this guide will help you create a production-ready environment that's both cost-effective and secure.
Prerequisites
Setting Up SSH Keys
If you don't have an SSH key, create one by running the following command in your terminal:
ssh-keygen -t ed25519 -C "[email protected]"
You'll see this prompt:
Enter file in which to save the key (/home/your_username/.ssh/id_ed25519):
Press Enter to save the key in the default location. You'll be asked to enter a passphrase. Create a strong passphrase and store it securely - preferably in a password manager. You'll need this passphrase whenever you use the SSH key.
After key creation, you'll see:
Your identification has been saved in /home/your_username/.ssh/id_ed25519.
Your public key has been saved in /home/your_username/.ssh/id_ed25519.pub.
The key fingerprint is:
Step 1: Server Setup
1.1 Creating a Hetzner Server
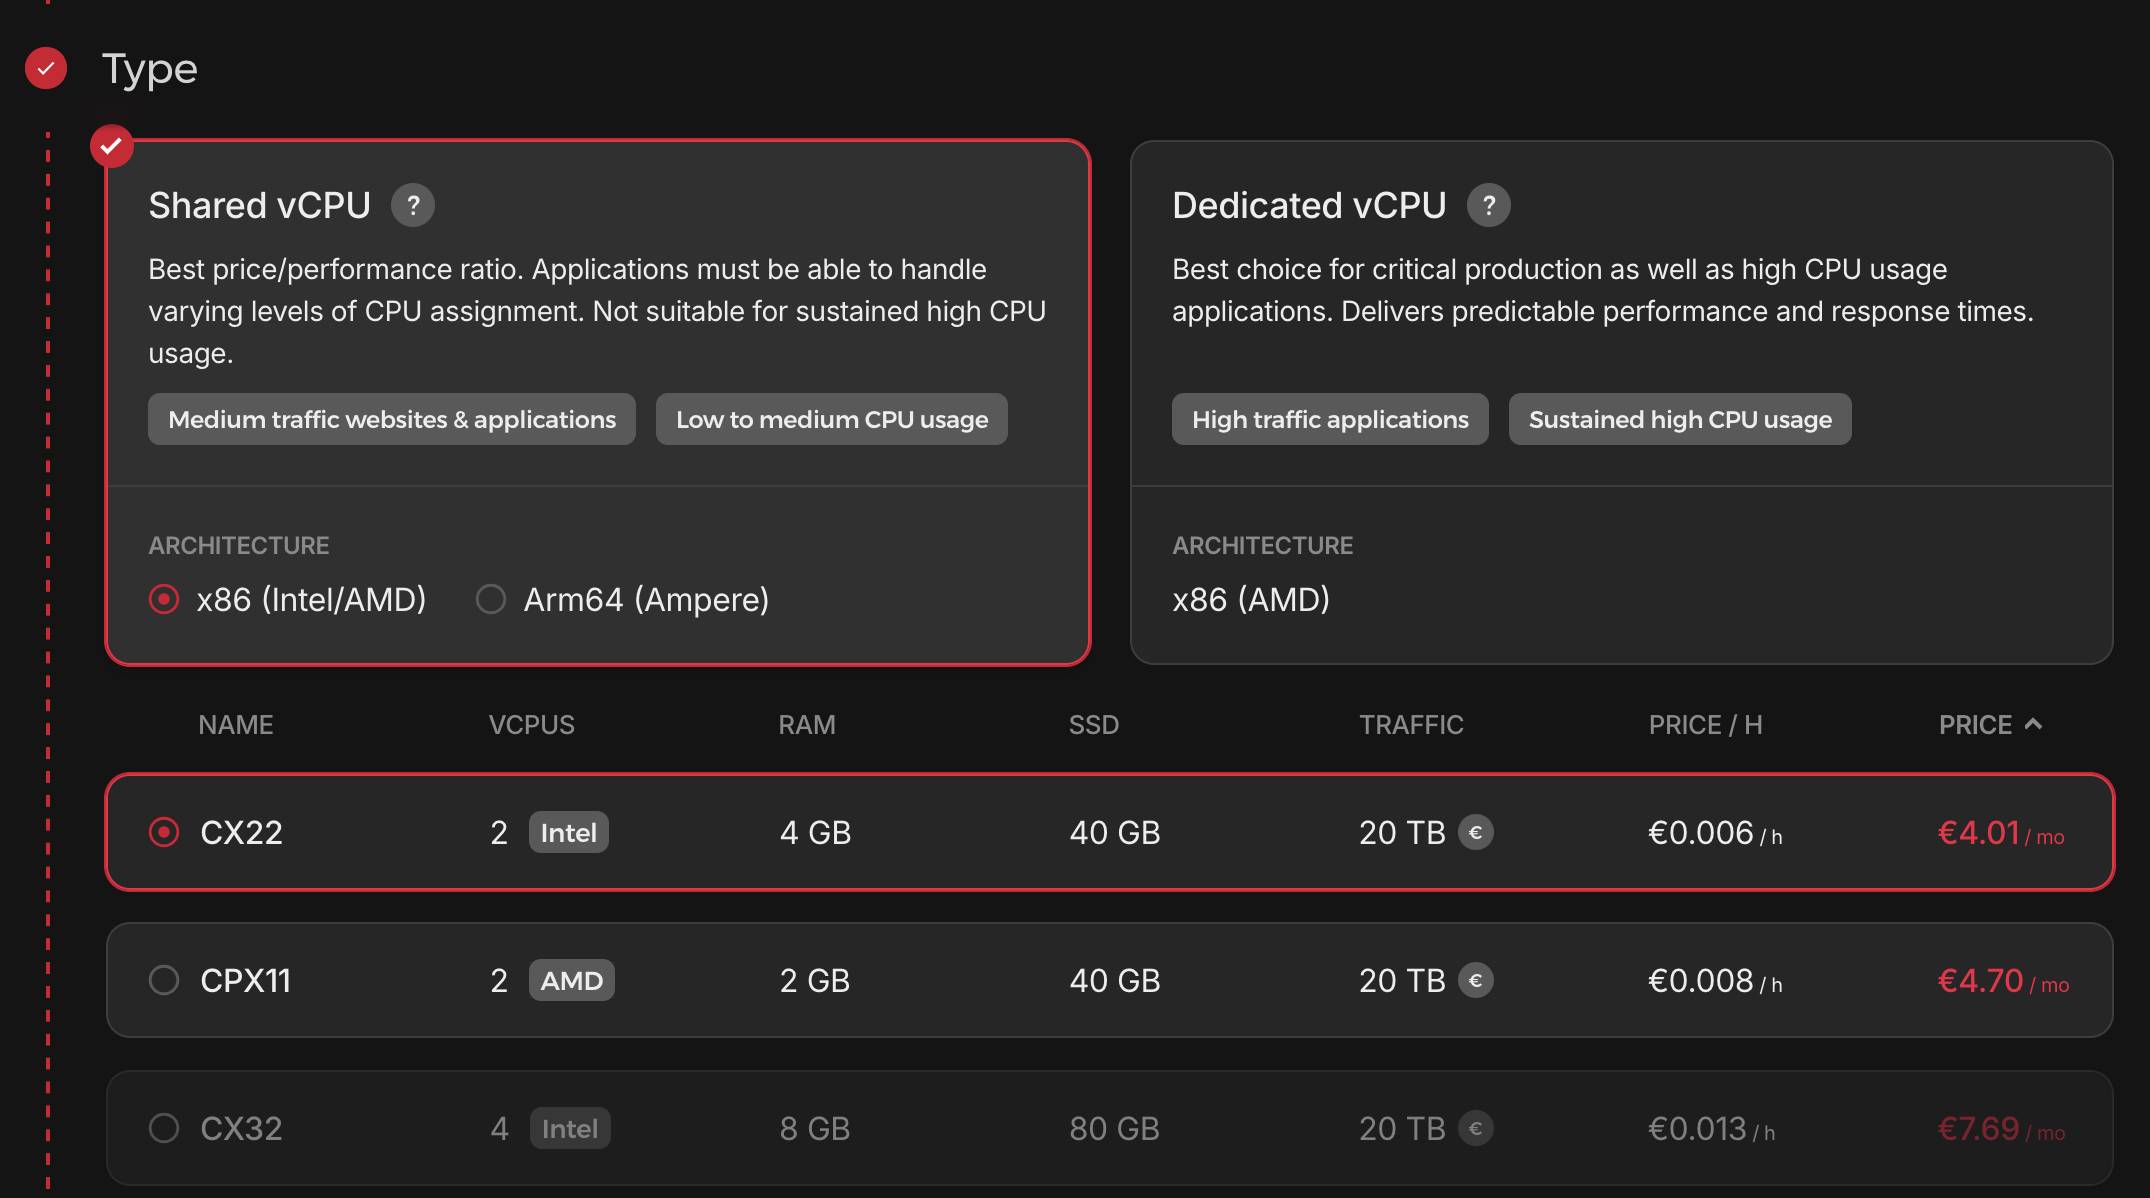
When selecting a server, consider these important requirements:
- CPU: Minimum 2 CPU cores for Coolify
- RAM: Minimum 4GB of RAM
- Disk Space: Minimum 30GB
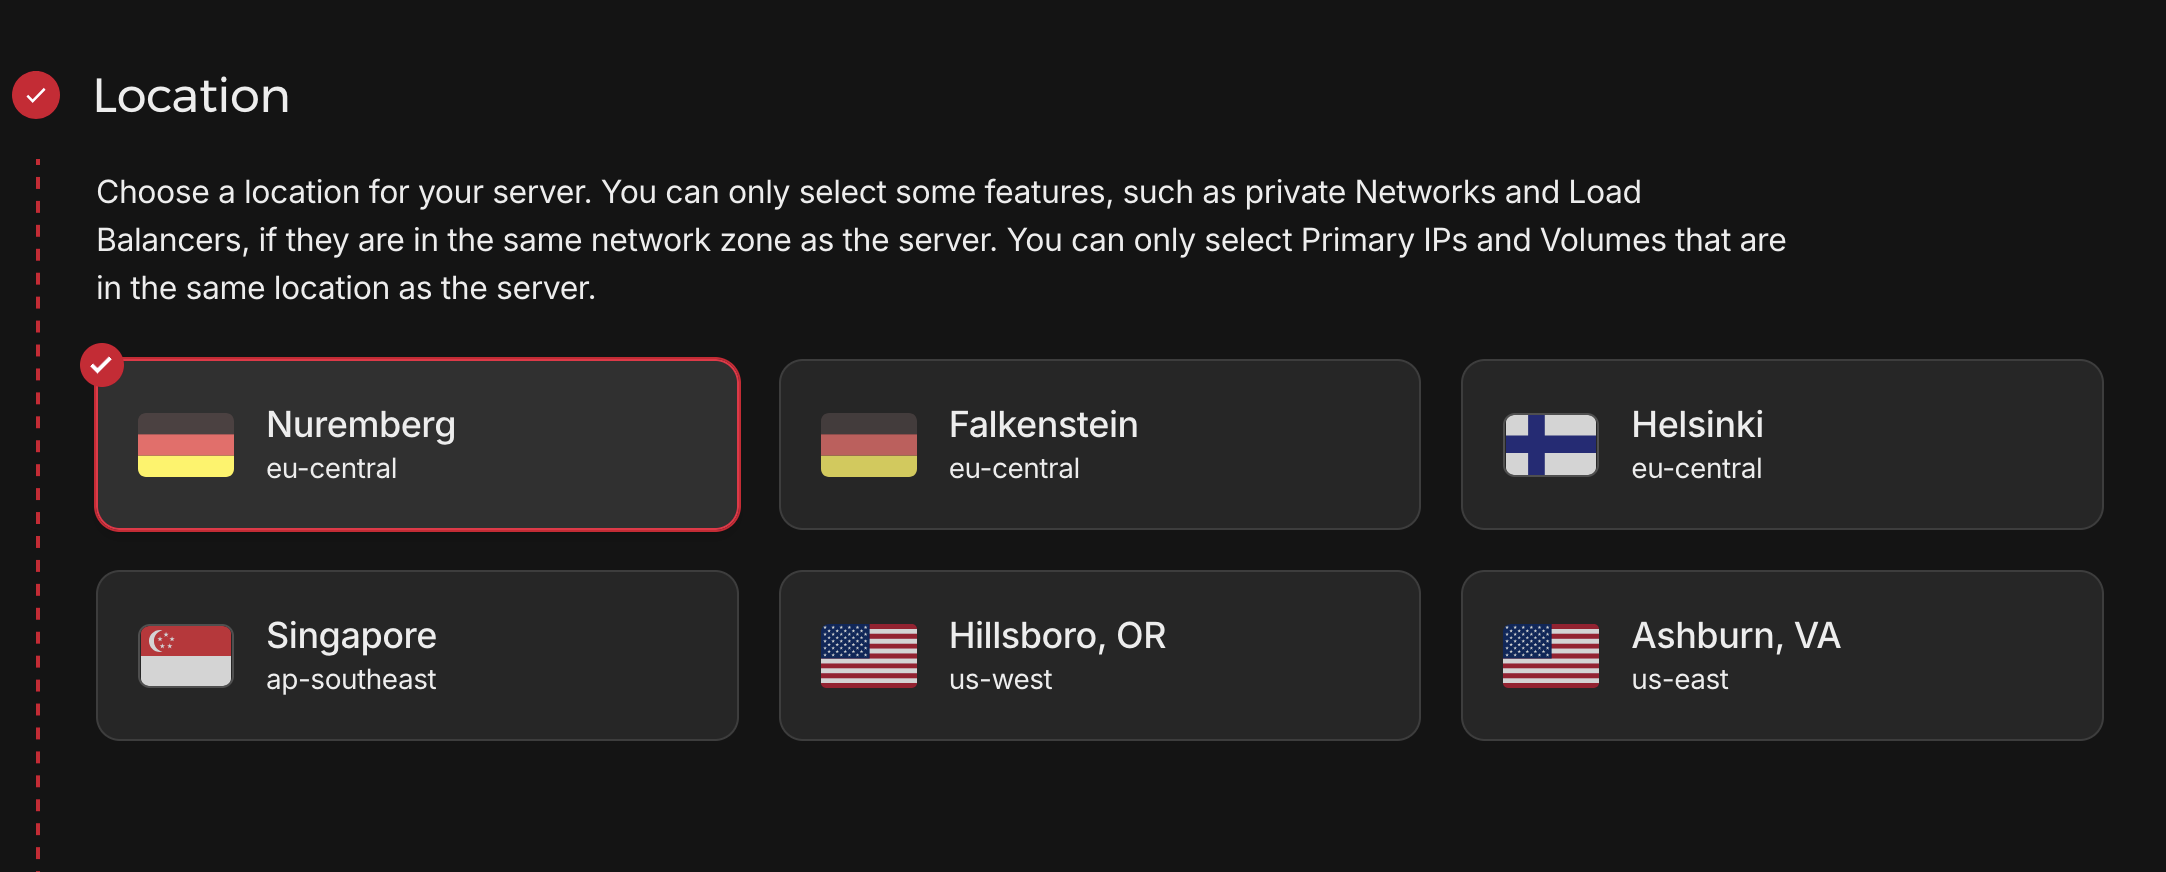
- Location: Choose based on your target audience's location to minimize latency
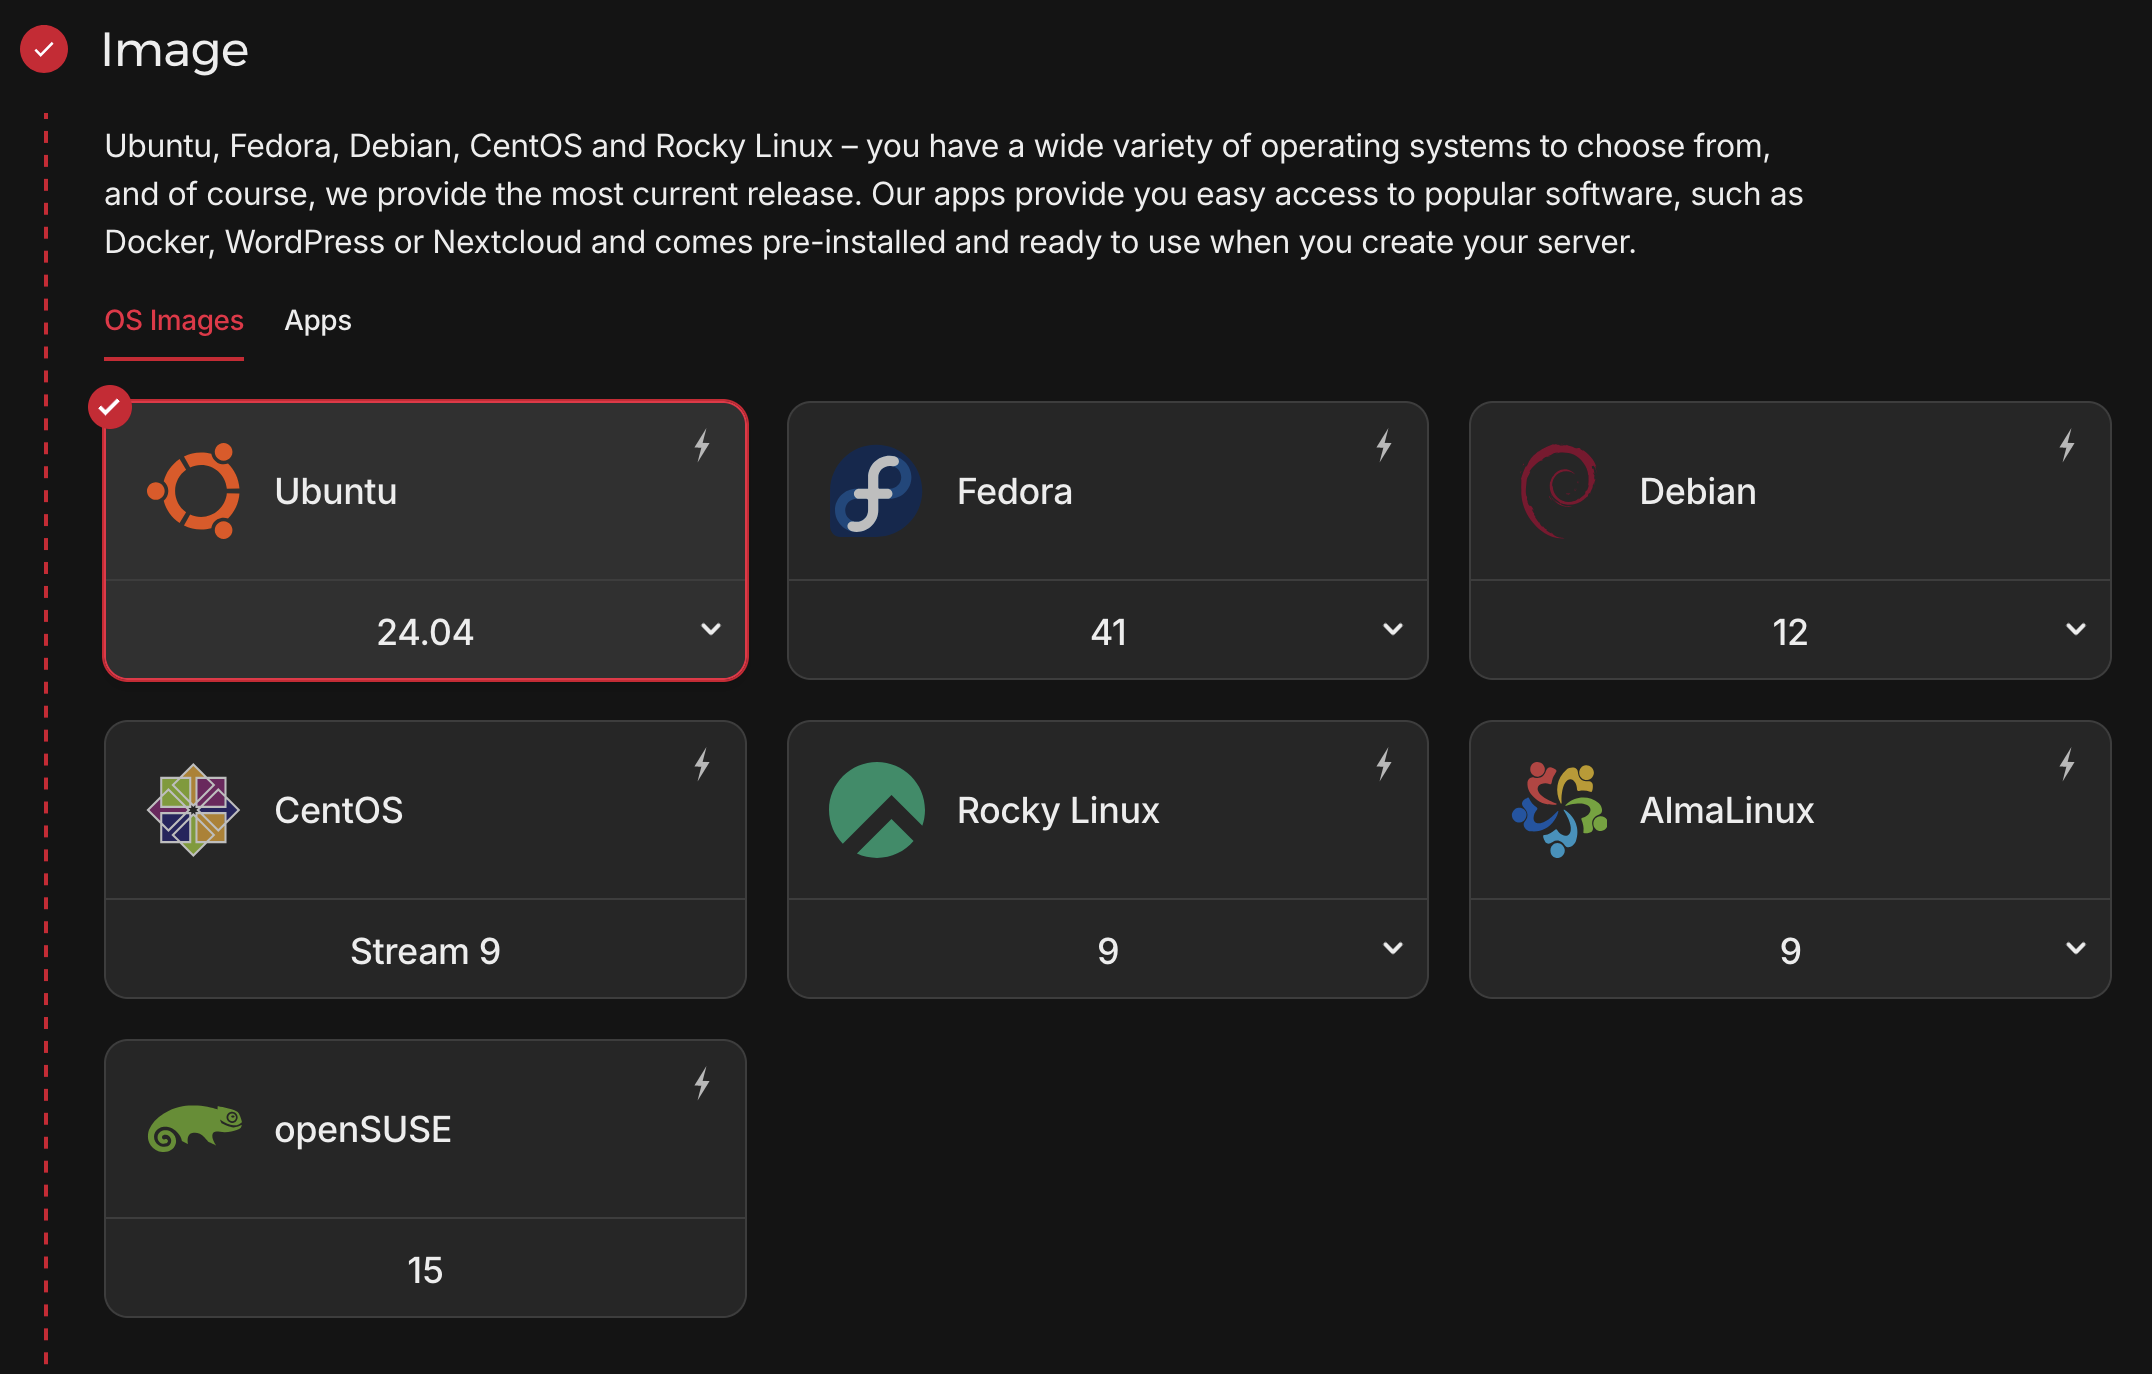
- Operating System: Ubuntu 24.04 (recommended)
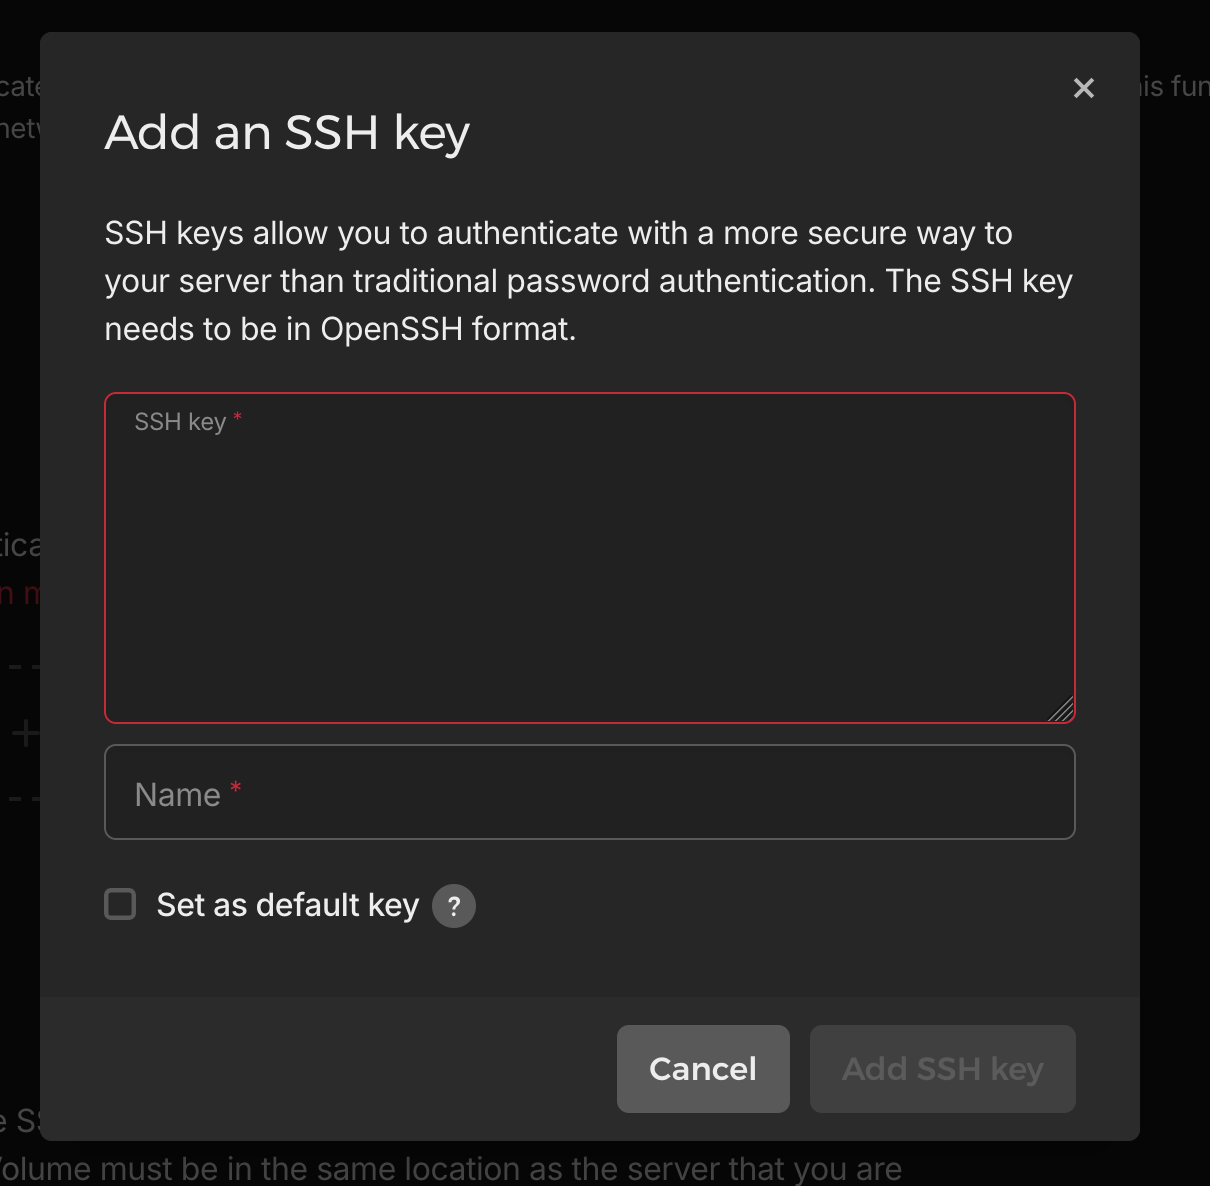
1.2 Adding SSH Key to Server
- Copy your public key using:
cat ~/.ssh/id_ed25519.pub
- Click "Add SSH Key"
- Paste the key content and give it a descriptive name
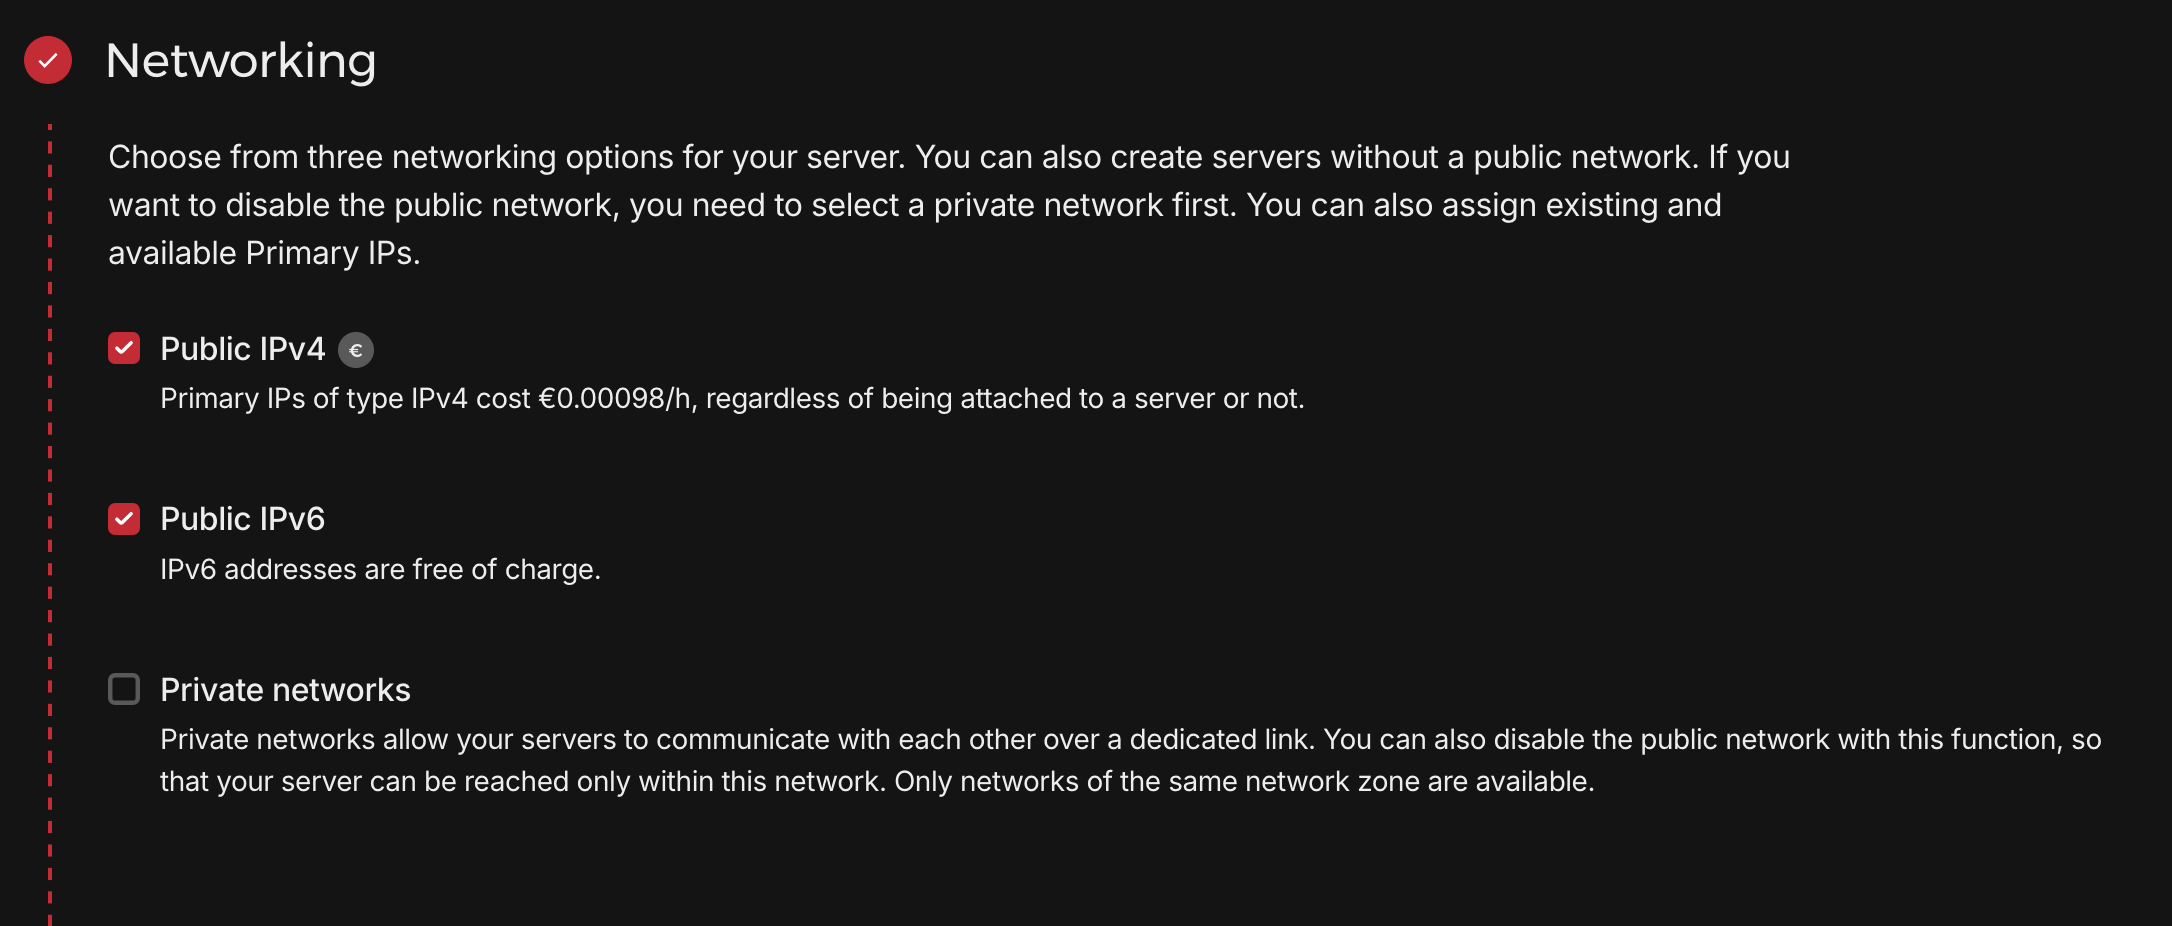
Click "Create & Buy Now" to proceed. The remaining sections can be left at their defaults. Server creation typically takes a few minutes, after which you'll see the IPv4 address in your dashboard.
Step 2: Coolify Installation
2.1 Connecting to Your Server
Connect to your server via SSH:
ssh root@<server_ip>
You'll see a prompt about adding the IP to your known hosts:
The authenticity of host '<server_ip>' can't be established.
ED25519 key fingerprint is SHA256:L1WGqdh9jEOSIrQ/eNcDOtgyYNDWCbTIlEtMcp8rs10.
This key is not known by any other names.
Are you sure you want to continue connecting (yes/no/[fingerprint])? yes
Warning: Permanently added '<server_ip>' (ED25519) to the list of known hosts.
Enter passphrase for key '/home/your_username/.ssh/id_ed25519':
Type "yes" to continue and enter your SSH key passphrase when prompted.
2.2 Installing Coolify
Install Coolify using:
curl -fsSL https://cdn.coollabs.io/coolify/install.sh | bash
Once installation completes, access the Coolify dashboard at http://<server_ip>:8000. Create a strong admin password and store it securely. You can skip the initial setup wizard for now.
Step 3: Domain Configuration
3.1 Setting Up Cloudflare Account
First, create a Cloudflare account at Cloudflare Sign Up if you haven't already.
From your Account Home, click "Add a Domain" and choose between using an existing domain or purchasing a new one. For existing domains, you'll need to update your domain's DNS servers to Cloudflare's. These changes typically propagate within minutes.
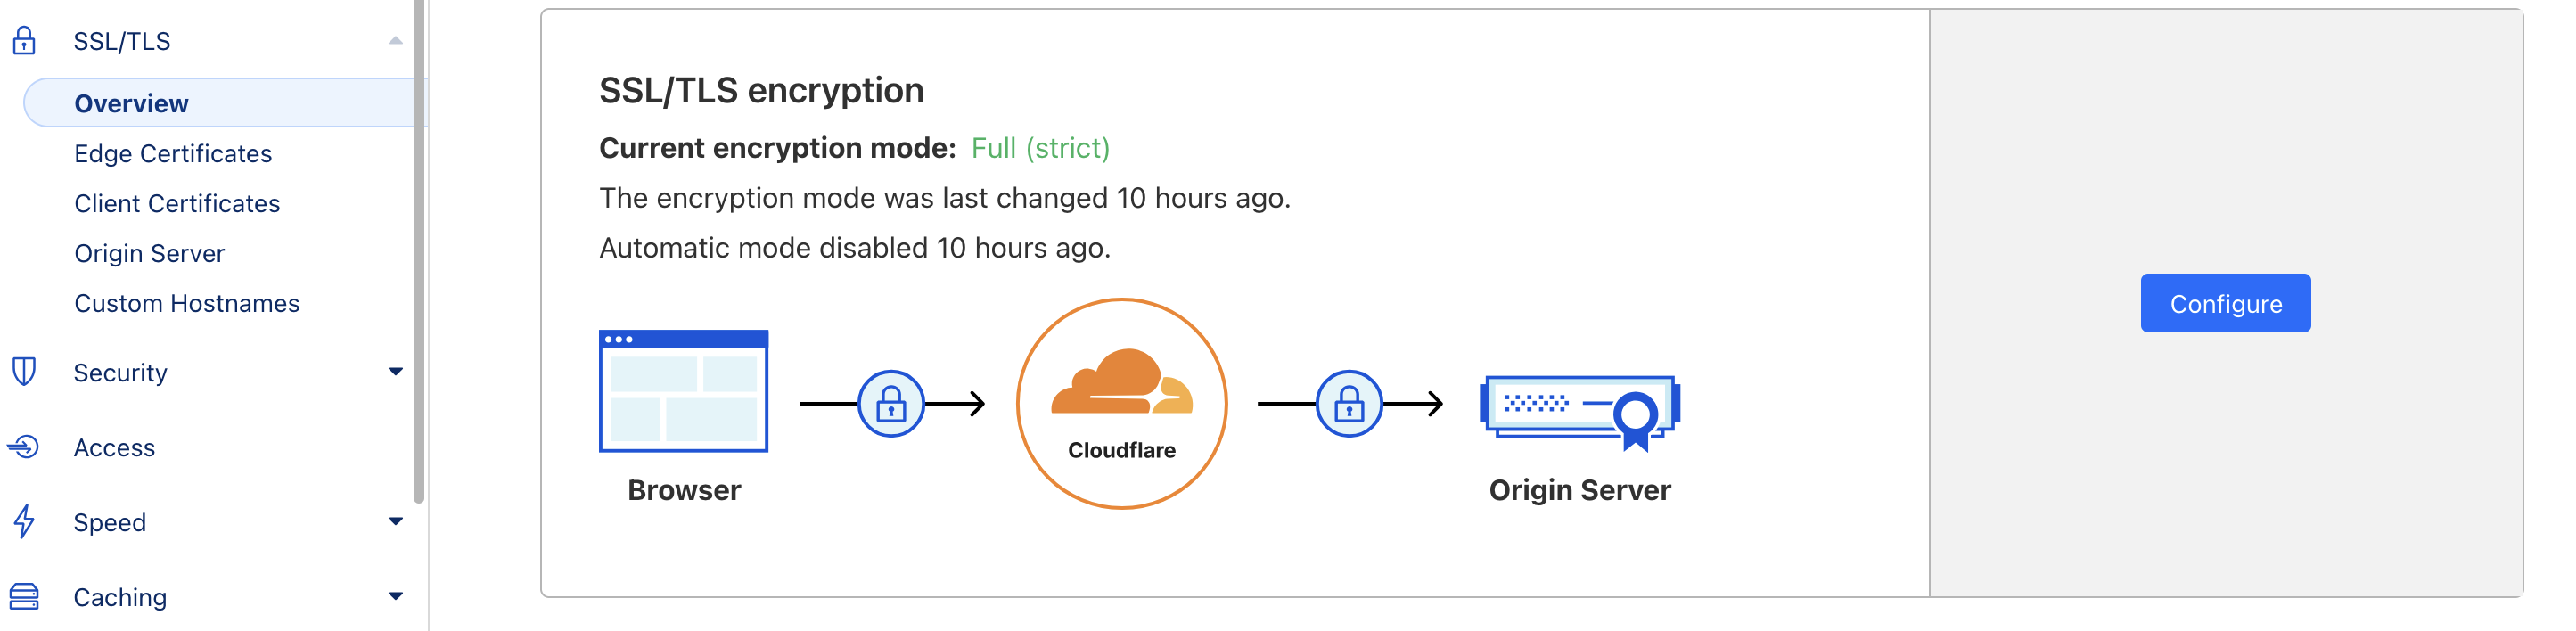
3.2 Configuring SSL/TLS
After domain verification, navigate to SSL/TLS Overview and set the encryption mode to "Full (strict)" to ensure proper HTTPS functionality. If you don't set this correctly, you'll experience issues with HTTPS redirects.
Step 4: Cloudflare Tunnel Setup
4.1 Understanding Cloudflare Tunnel
Cloudflare Tunnel provides a secure connection between your server and Cloudflare's network without exposing your server's IP address. Key benefits include:
- Enhanced Security: Server remains hidden from public internet
- No Public IP Required: Services can run without public IP exposure
- Easy Setup: No manual DNS or firewall configuration needed
- Automatic TLS: Traffic encrypted between server and Cloudflare
- Zero Trust Integration: Optional identity-based access control
4.2 Creating the Tunnel
- Enable Zero Trust in your Cloudflare dashboard (requires adding billing info, but free tier available)
- Navigate to Networks > Tunnels
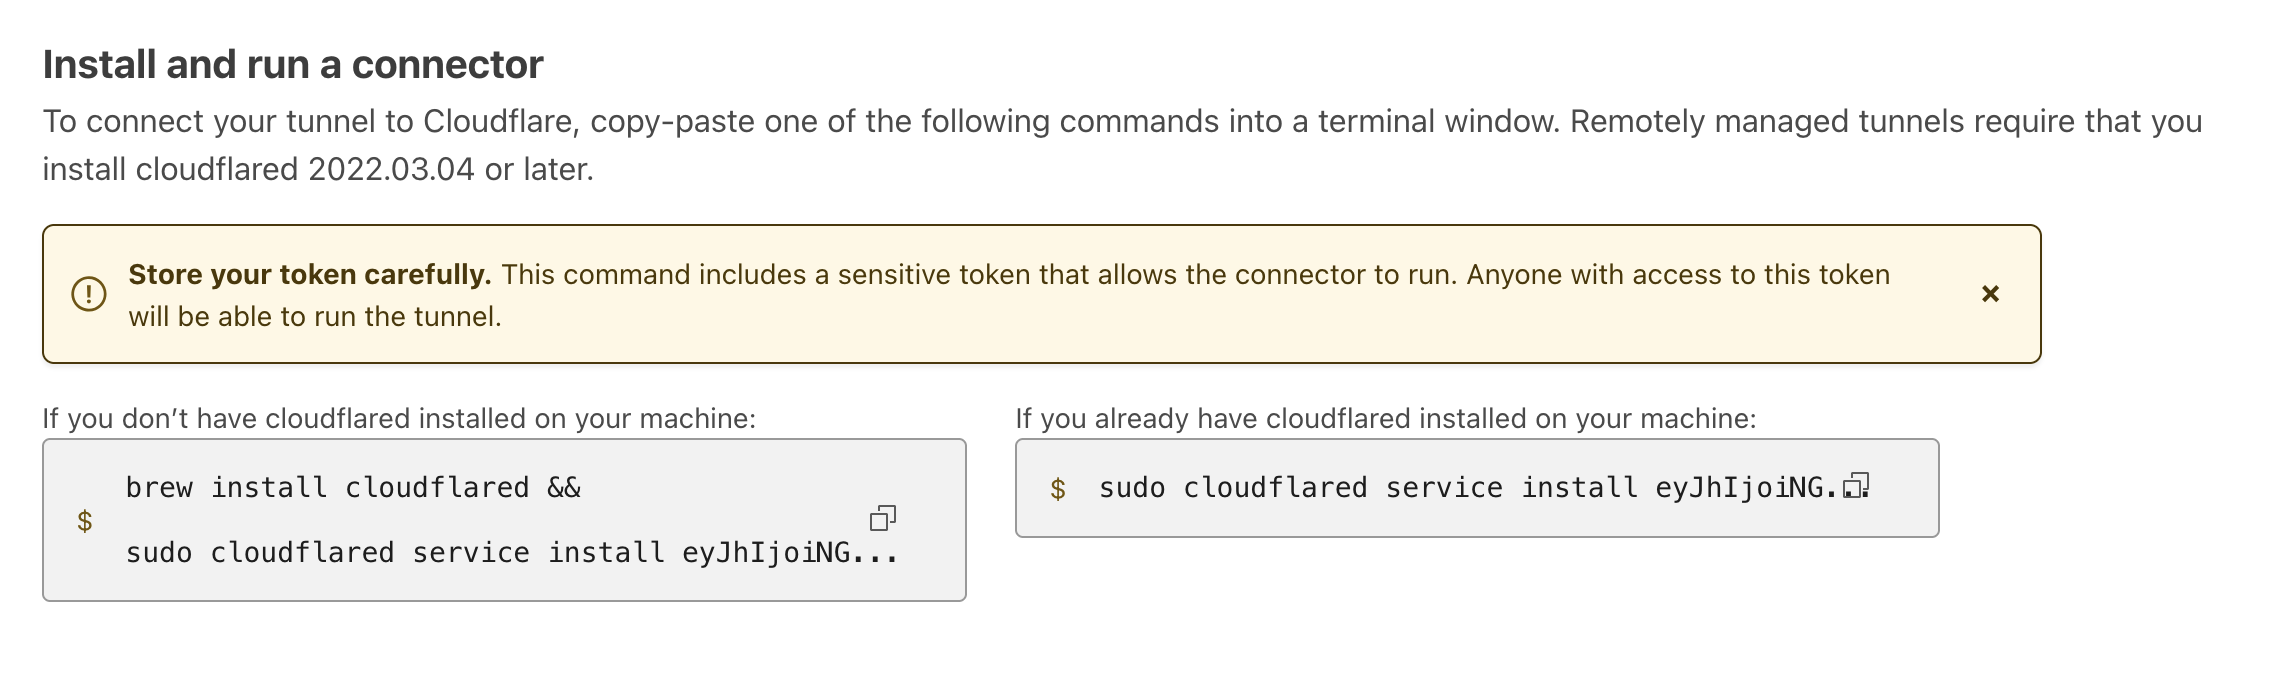
- Click "Create a Tunnel" and select "Cloudflared"
- Name your tunnel and save
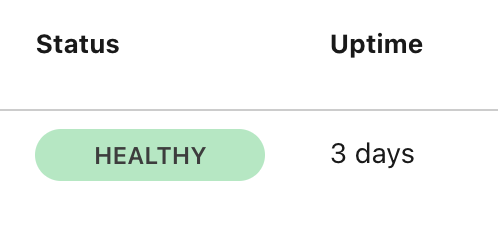
Follow the installation instructions for your operating system. The tunnel status should show as healthy after running the provided command.
4.3 Configuring Hostnames
Configure two hostnames:
- Root domain (e.g.,
example.com) - Wildcard subdomain (e.g.,
*.example.com)
For each, set:
- Service type: HTTPS
- URL:
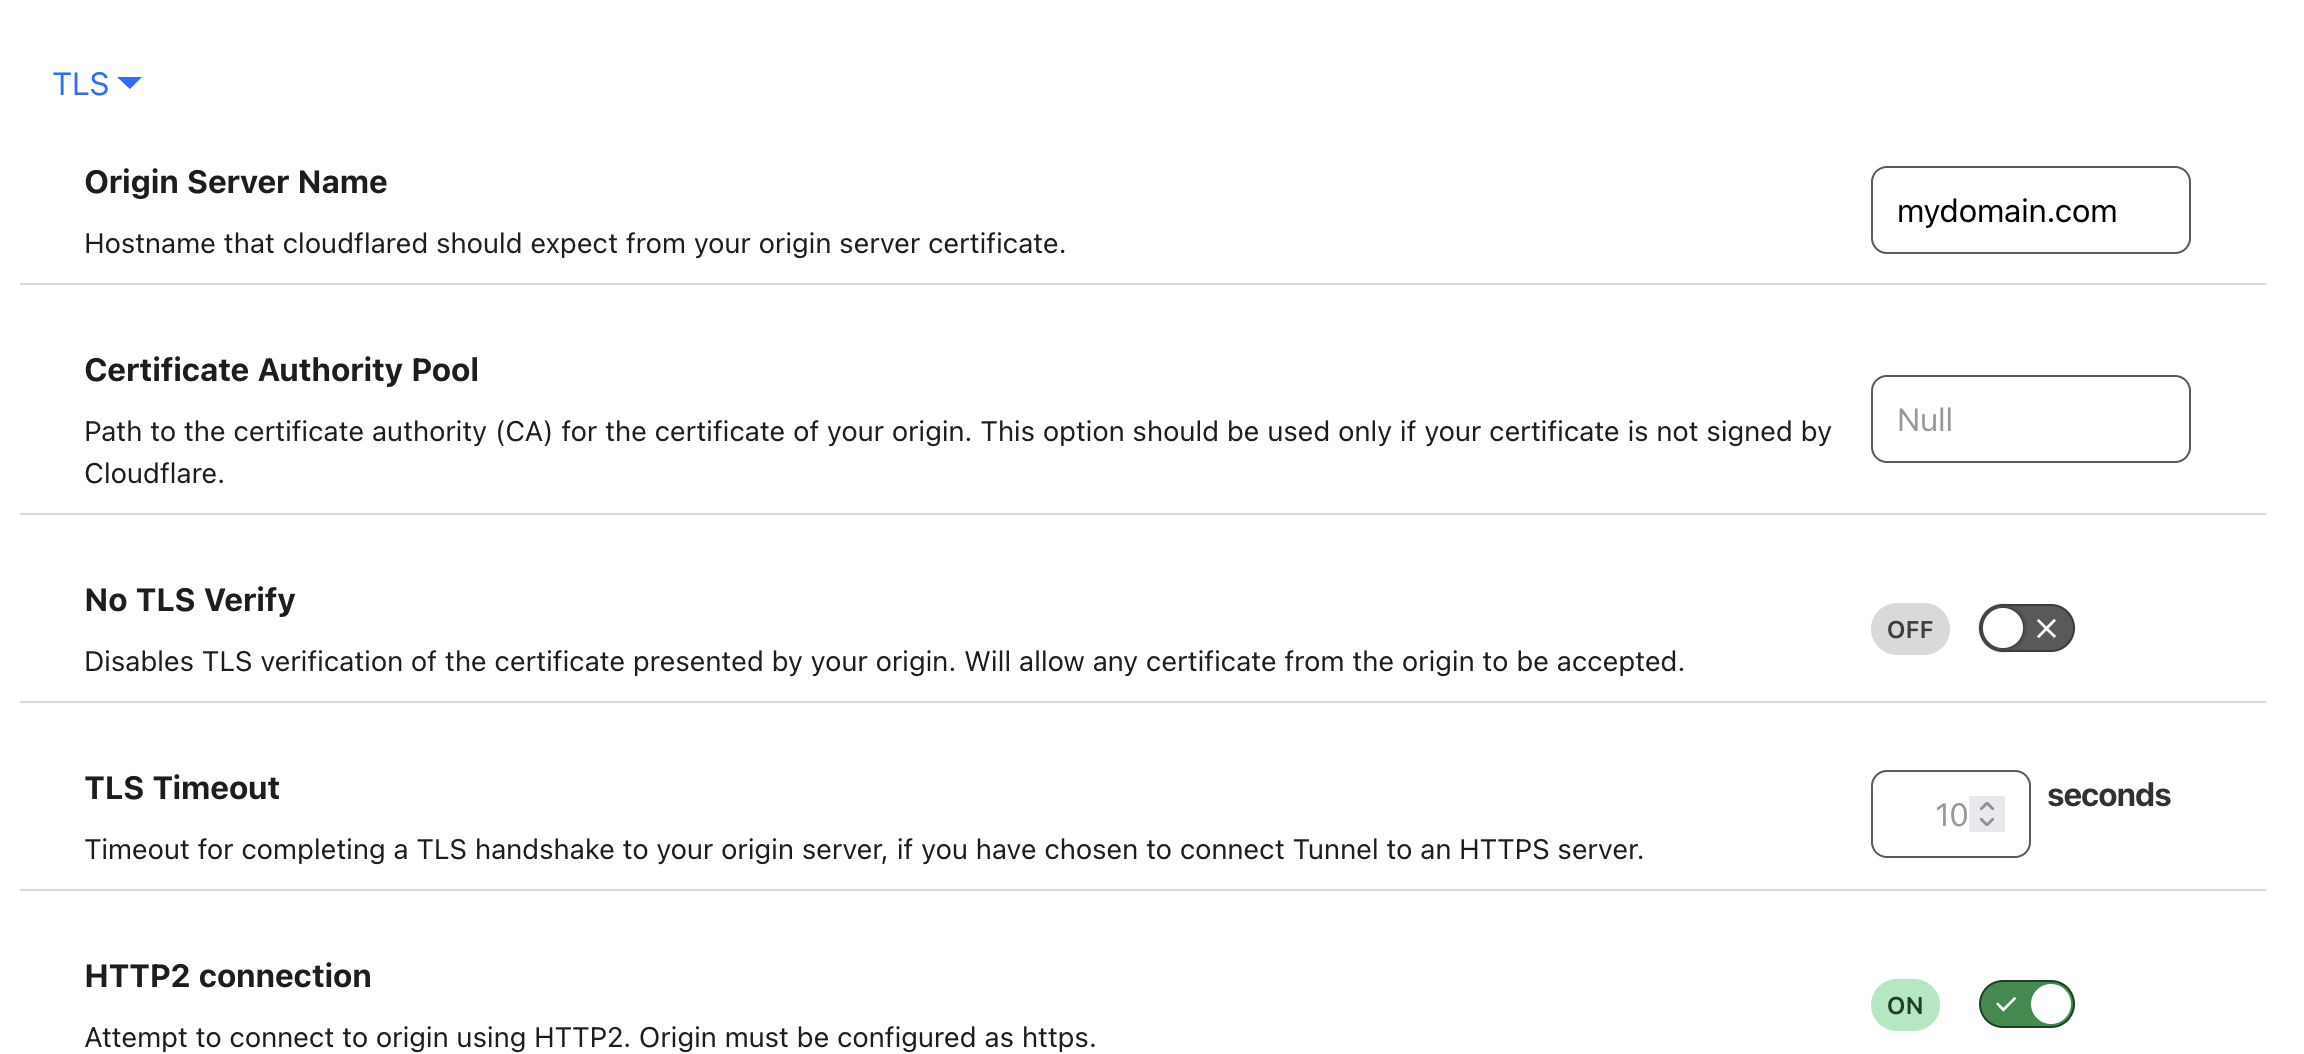
localhost:443 - TLS settings:
- Origin Server Name: your domain name
- Enable HTTP/2
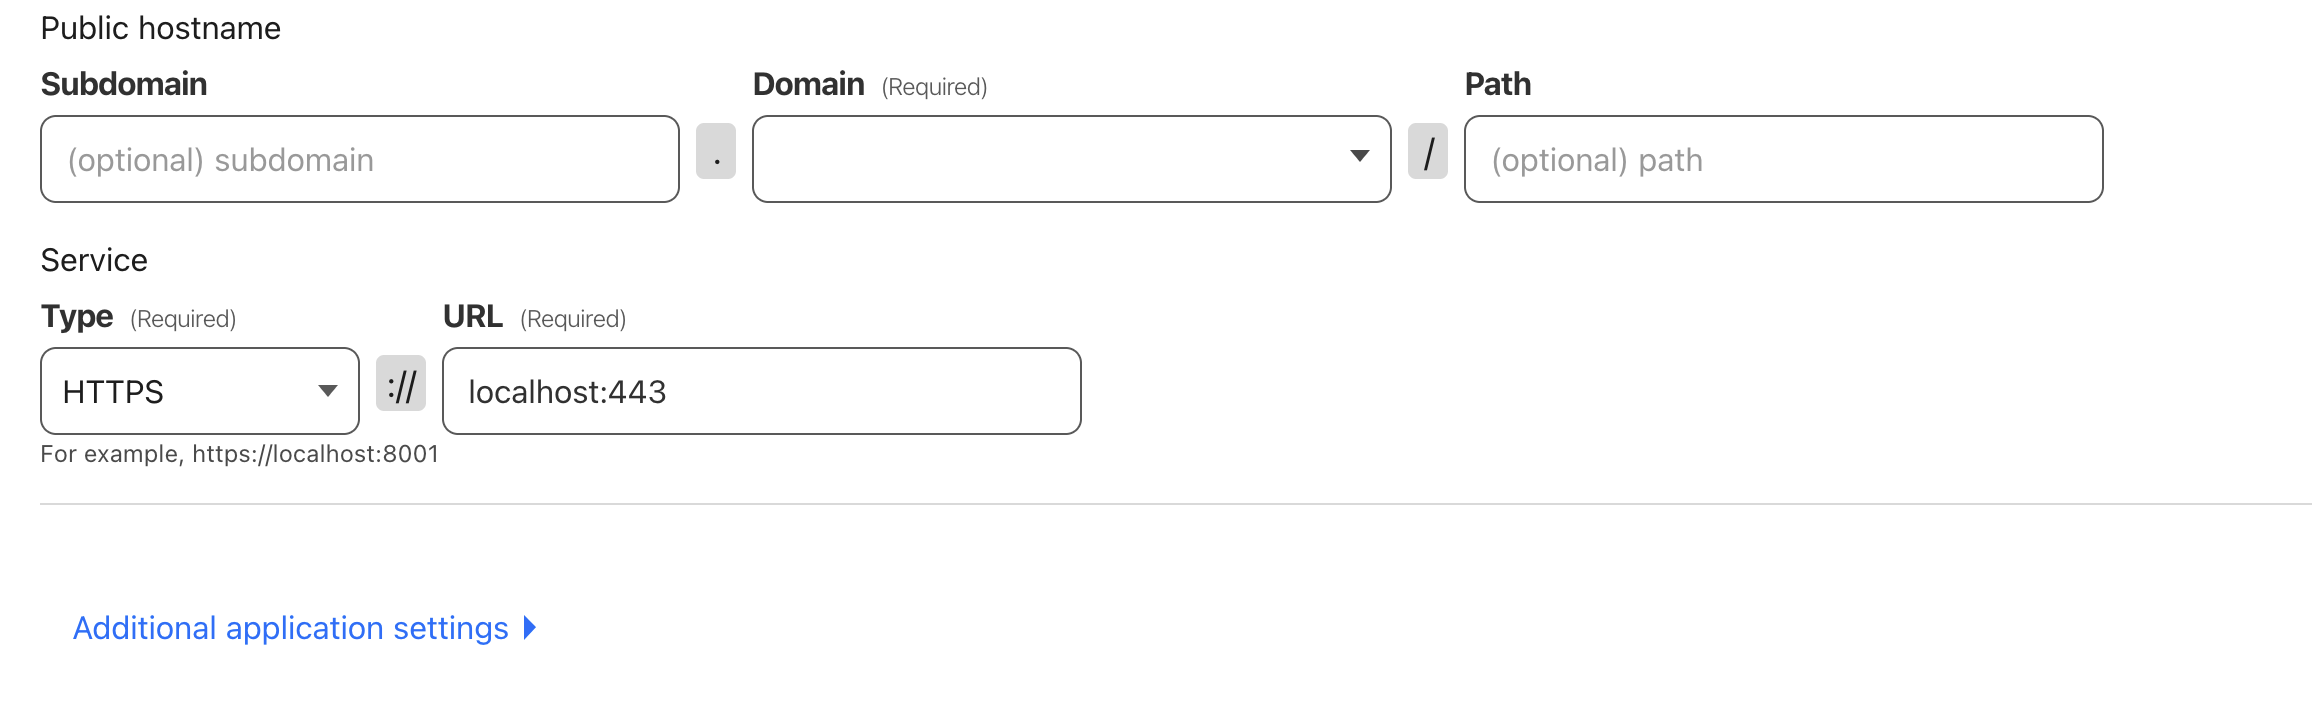
Ensure the root domain entry appears before the wildcard subdomain in the Public Hostnames section. After adding the hostnames, check your DNS settings page to verify that two new CNAME records have been created.
Step 5: SSL Certificate Configuration
5.1 Generating Certificate
SSH into your server:
ssh root@<server_ip>
Install acme.sh:
curl https://get.acme.sh | sh
Restart your session to add acme.sh to PATH.
Create a Cloudflare API token with DNS edit permissions:


Export the token:
export CF_Token="token"
Make sure to replace "token" with your actual Cloudflare API token. Keep this token secure and never share it publicly.
Generate the certificate:
acme.sh --issue --dns dns_cf --ocsp-must-staple --keylength 4096 -d domain.com -d '*.domain.com'
5.2 Applying Certificate in Coolify
Create a certificate directory:
mkdir /data/coolify/proxy/certs
Copy the certificate files:
cp path/to/fullchain.cer /data/coolify/proxy/certs/
cp path/to/domain.com.key /data/coolify/proxy/certs/
Replace path/to/ with the actual paths provided by acme.sh in the previous step.
In Coolify, go to Servers > localhost > Proxy > Dynamic Configuration. Create cert.yaml:
tls:
  certificates:
    - certFile: /traefik/certs/fullchain.cer
      keyFile: /traefik/certs/domainName.key
Restart the proxy server to apply changes.
Step 6: Security Configuration
6.1 Configuring Firewall
Set up basic firewall rules:
ufw default allow outgoing
ufw default deny incoming
ufw allow ssh
ufw enable
ufw status
Step 7: Application Deployment
7.1 Deploying Your First Application
Now that we have our Coolify server set up and secured, let's deploy an application to test everything. For this tutorial, we'll deploy Mealie, a self-hosted recipe manager and meal planner.
- In the Coolify dashboard, navigate to Projects and either select an existing project or create a new one
- Click "Add Resource" to your project and search for Mealie in the list of available applications

- After selecting Mealie, click on "Settings" to configure the domain
- Set the domain to
mealie.yourdomain.com(replace yourdomain.com with your actual domain)

- Save the settings and deploy the resource
- Once deployment is complete, your application will be accessible at
https://mealie.yourdomain.com
Step 8: Advanced Security (Optional)
The Advanced Security section focuses on implementing Cloudflare Access, a zero-trust security solution that adds an additional layer of protection to your Coolify applications. Instead of allowing anyone with your domain URL to access your applications, Cloudflare Access lets you:
- Control who can access your applications using identity providers (like GitHub)
- Implement single sign-on (SSO) across all your applications
- Monitor and audit access attempts
- Apply granular access policies based on user identity, location, or device
- Protect both public-facing and internal applications
This is particularly useful when:
- You're hosting internal tools that should only be accessible to your team
- You want to restrict access to staging/development environments
- You need to maintain detailed access logs for compliance
- You want to implement multi-factor authentication (MFA) for your applications
8.1 Setting Up Cloudflare Access
This section covers setting up GitHub as an identity provider for secure access control.
- In GitHub, go to Settings > Developer Settings > OAuth Apps > Register a new application
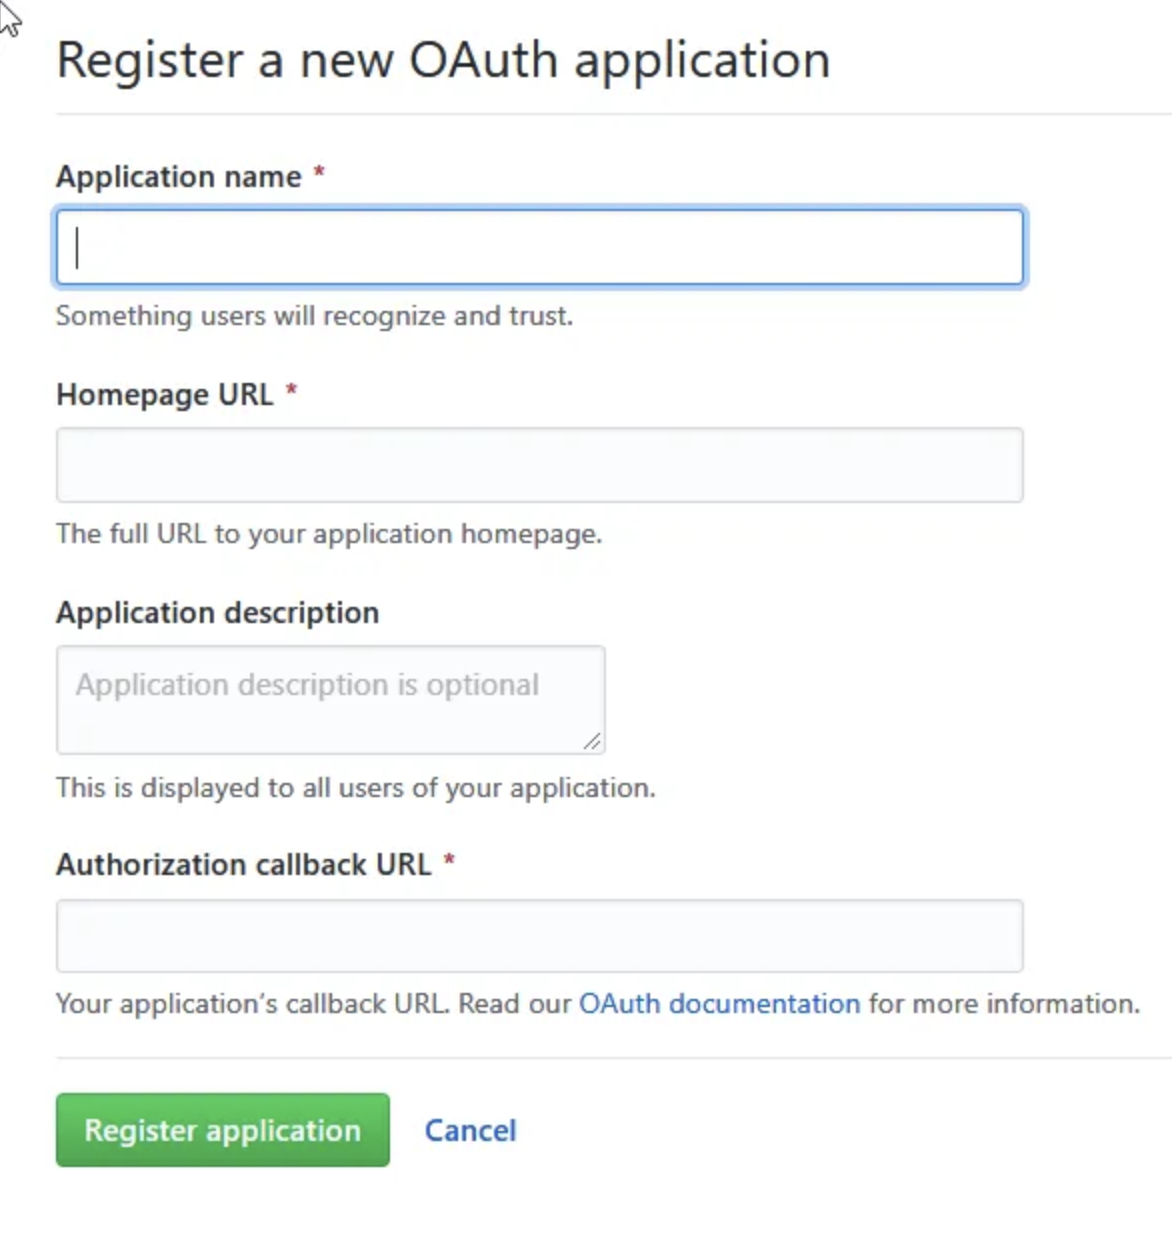
- Configure the application:
- Name: Choose a user-friendly name (this will be shown to users on the login page)
- Homepage URL:
https://<your-team-name>.cloudflareaccess.com - Authorization callback URL:
https://<your-team-name>.cloudflareaccess.com/cdn-cgi/access/callback
Note: You can find your team name in Zero Trust under Settings > Custom Pages.
8.2 Configuring GitHub Authentication
- Save the Client ID and Secret
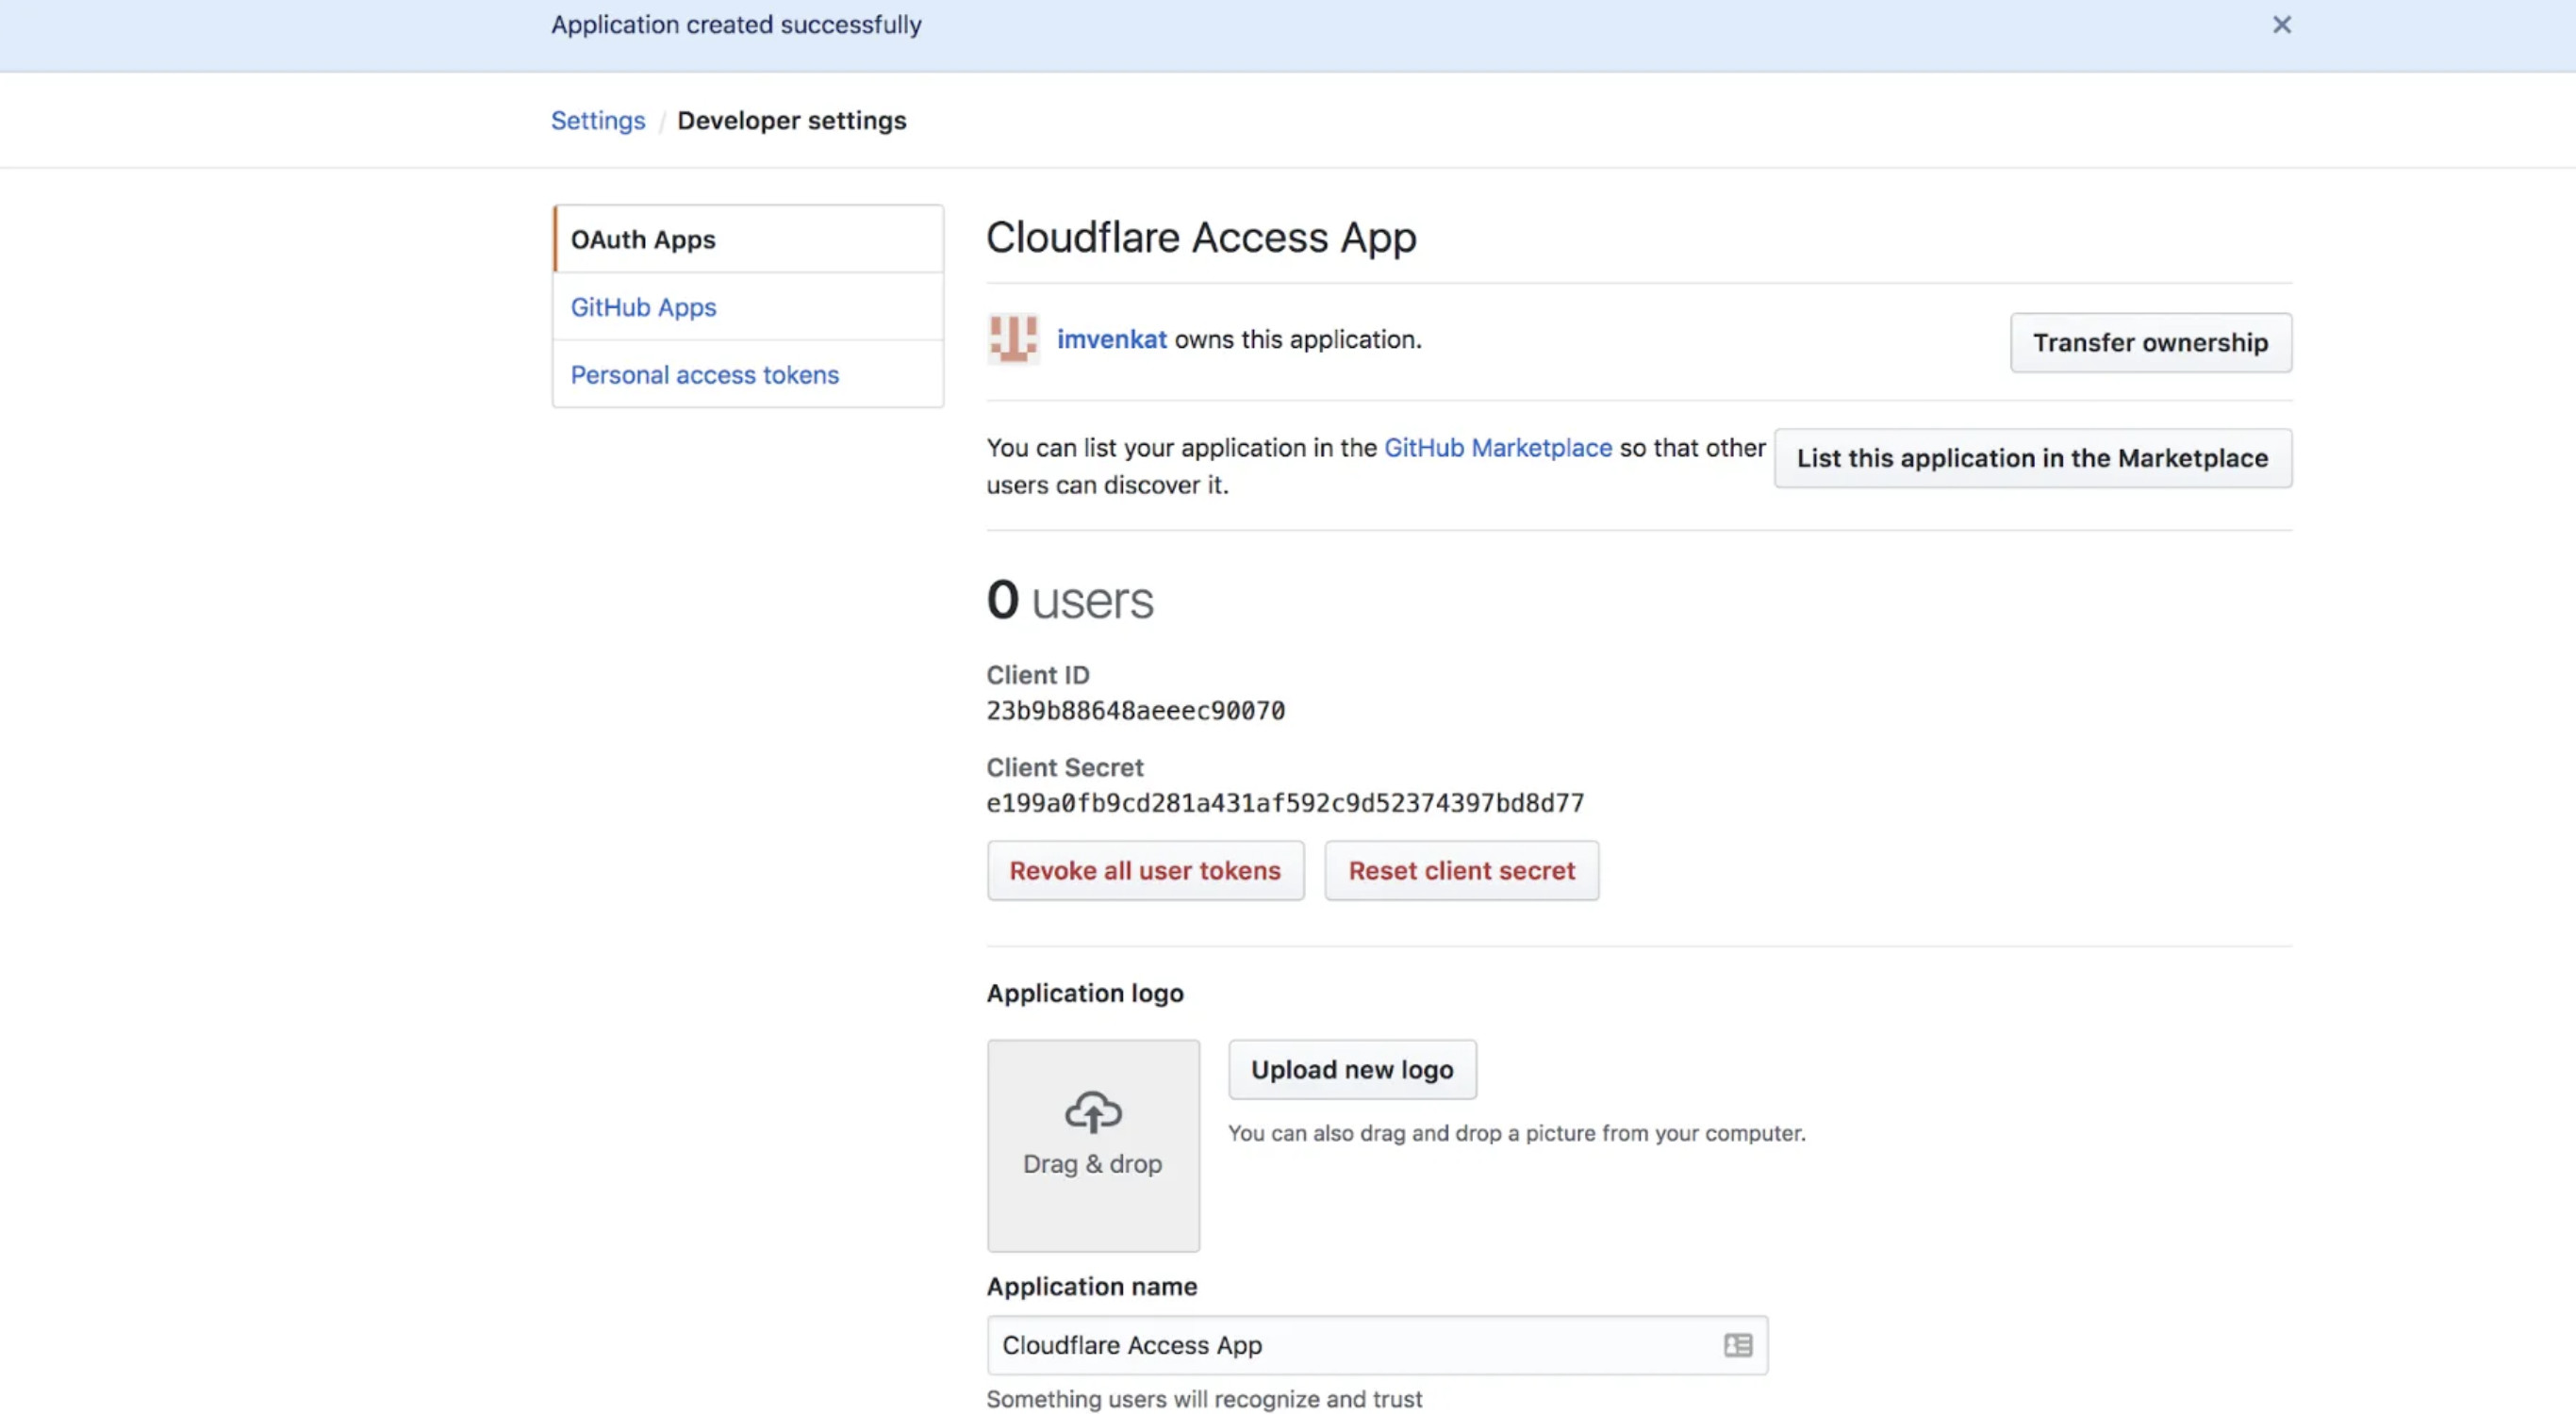
- In Cloudflare Zero Trust, go to Settings > Authentication
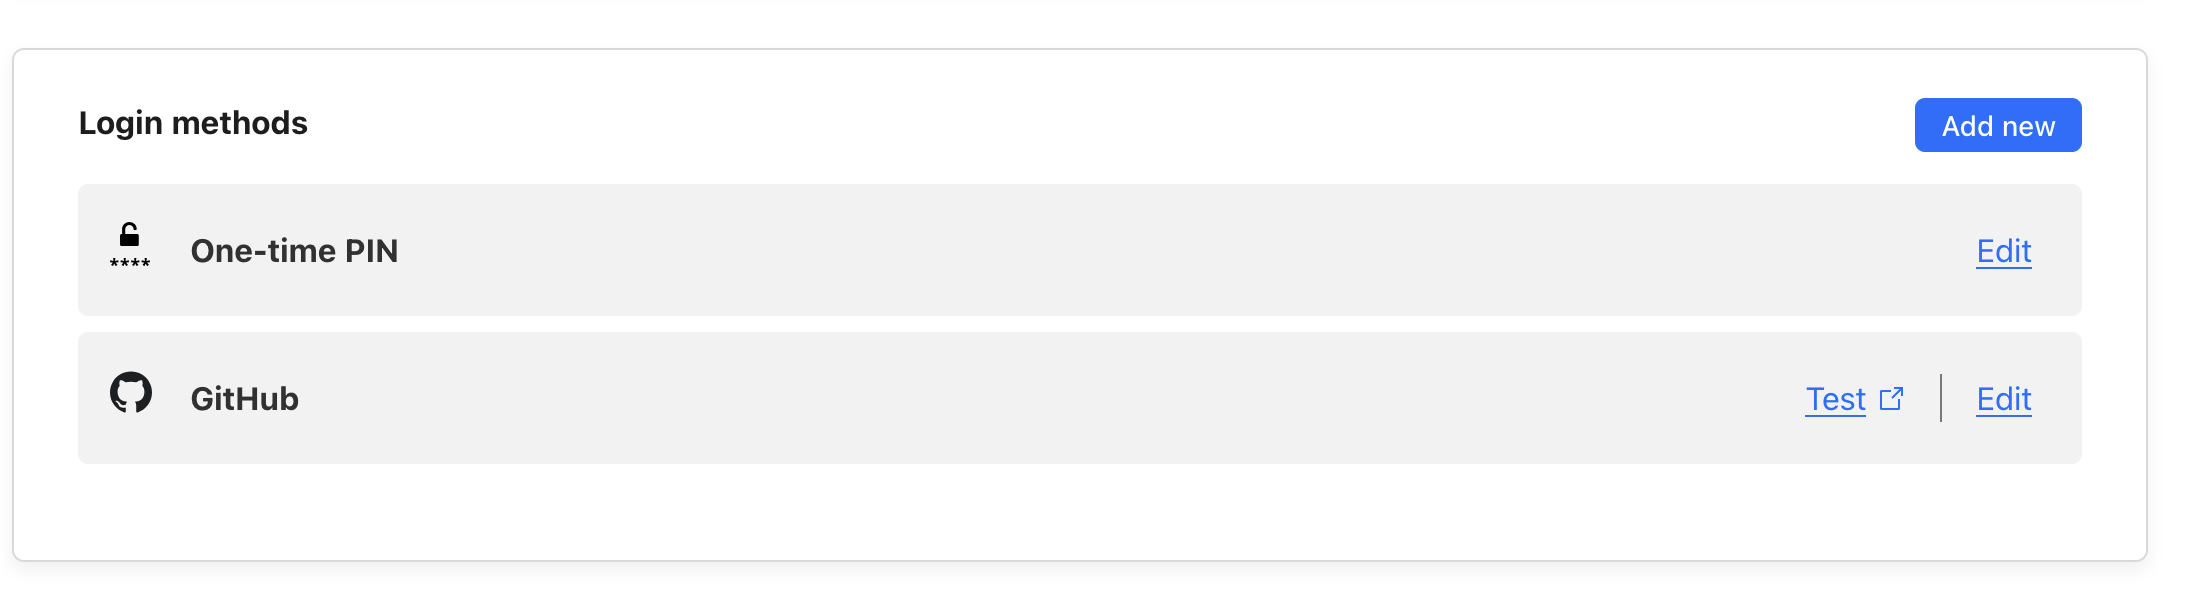
- Add GitHub as a login method
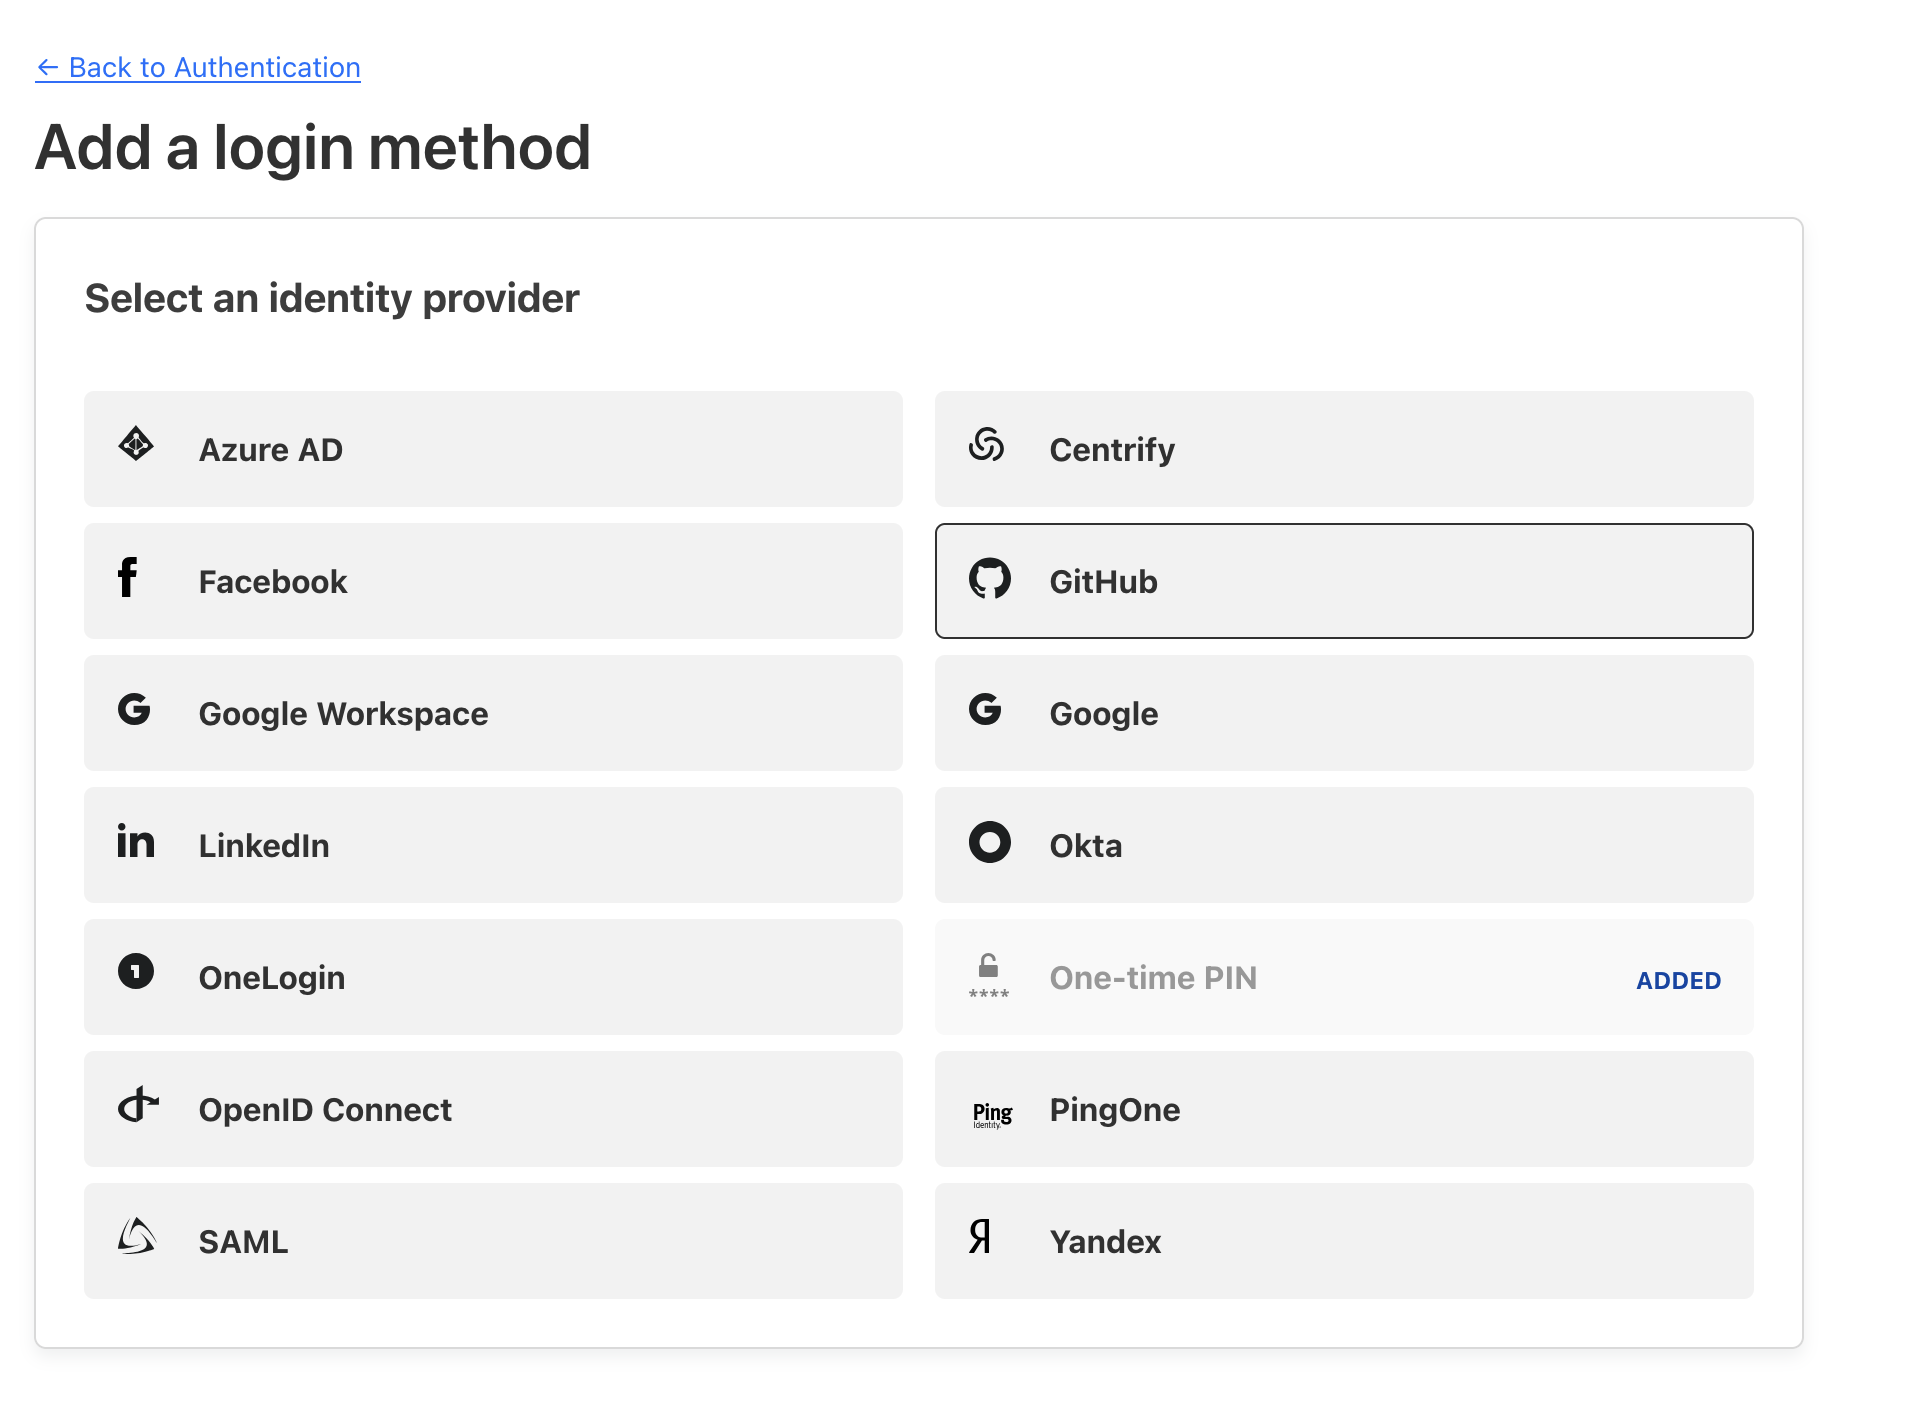
- After selecting Github, fill in the Client ID and Secret from the first step and continue.
8.3 Creating Access Policies
- Create an Access application:
- Go to Access > Applications
- Choose "Self-hosted"
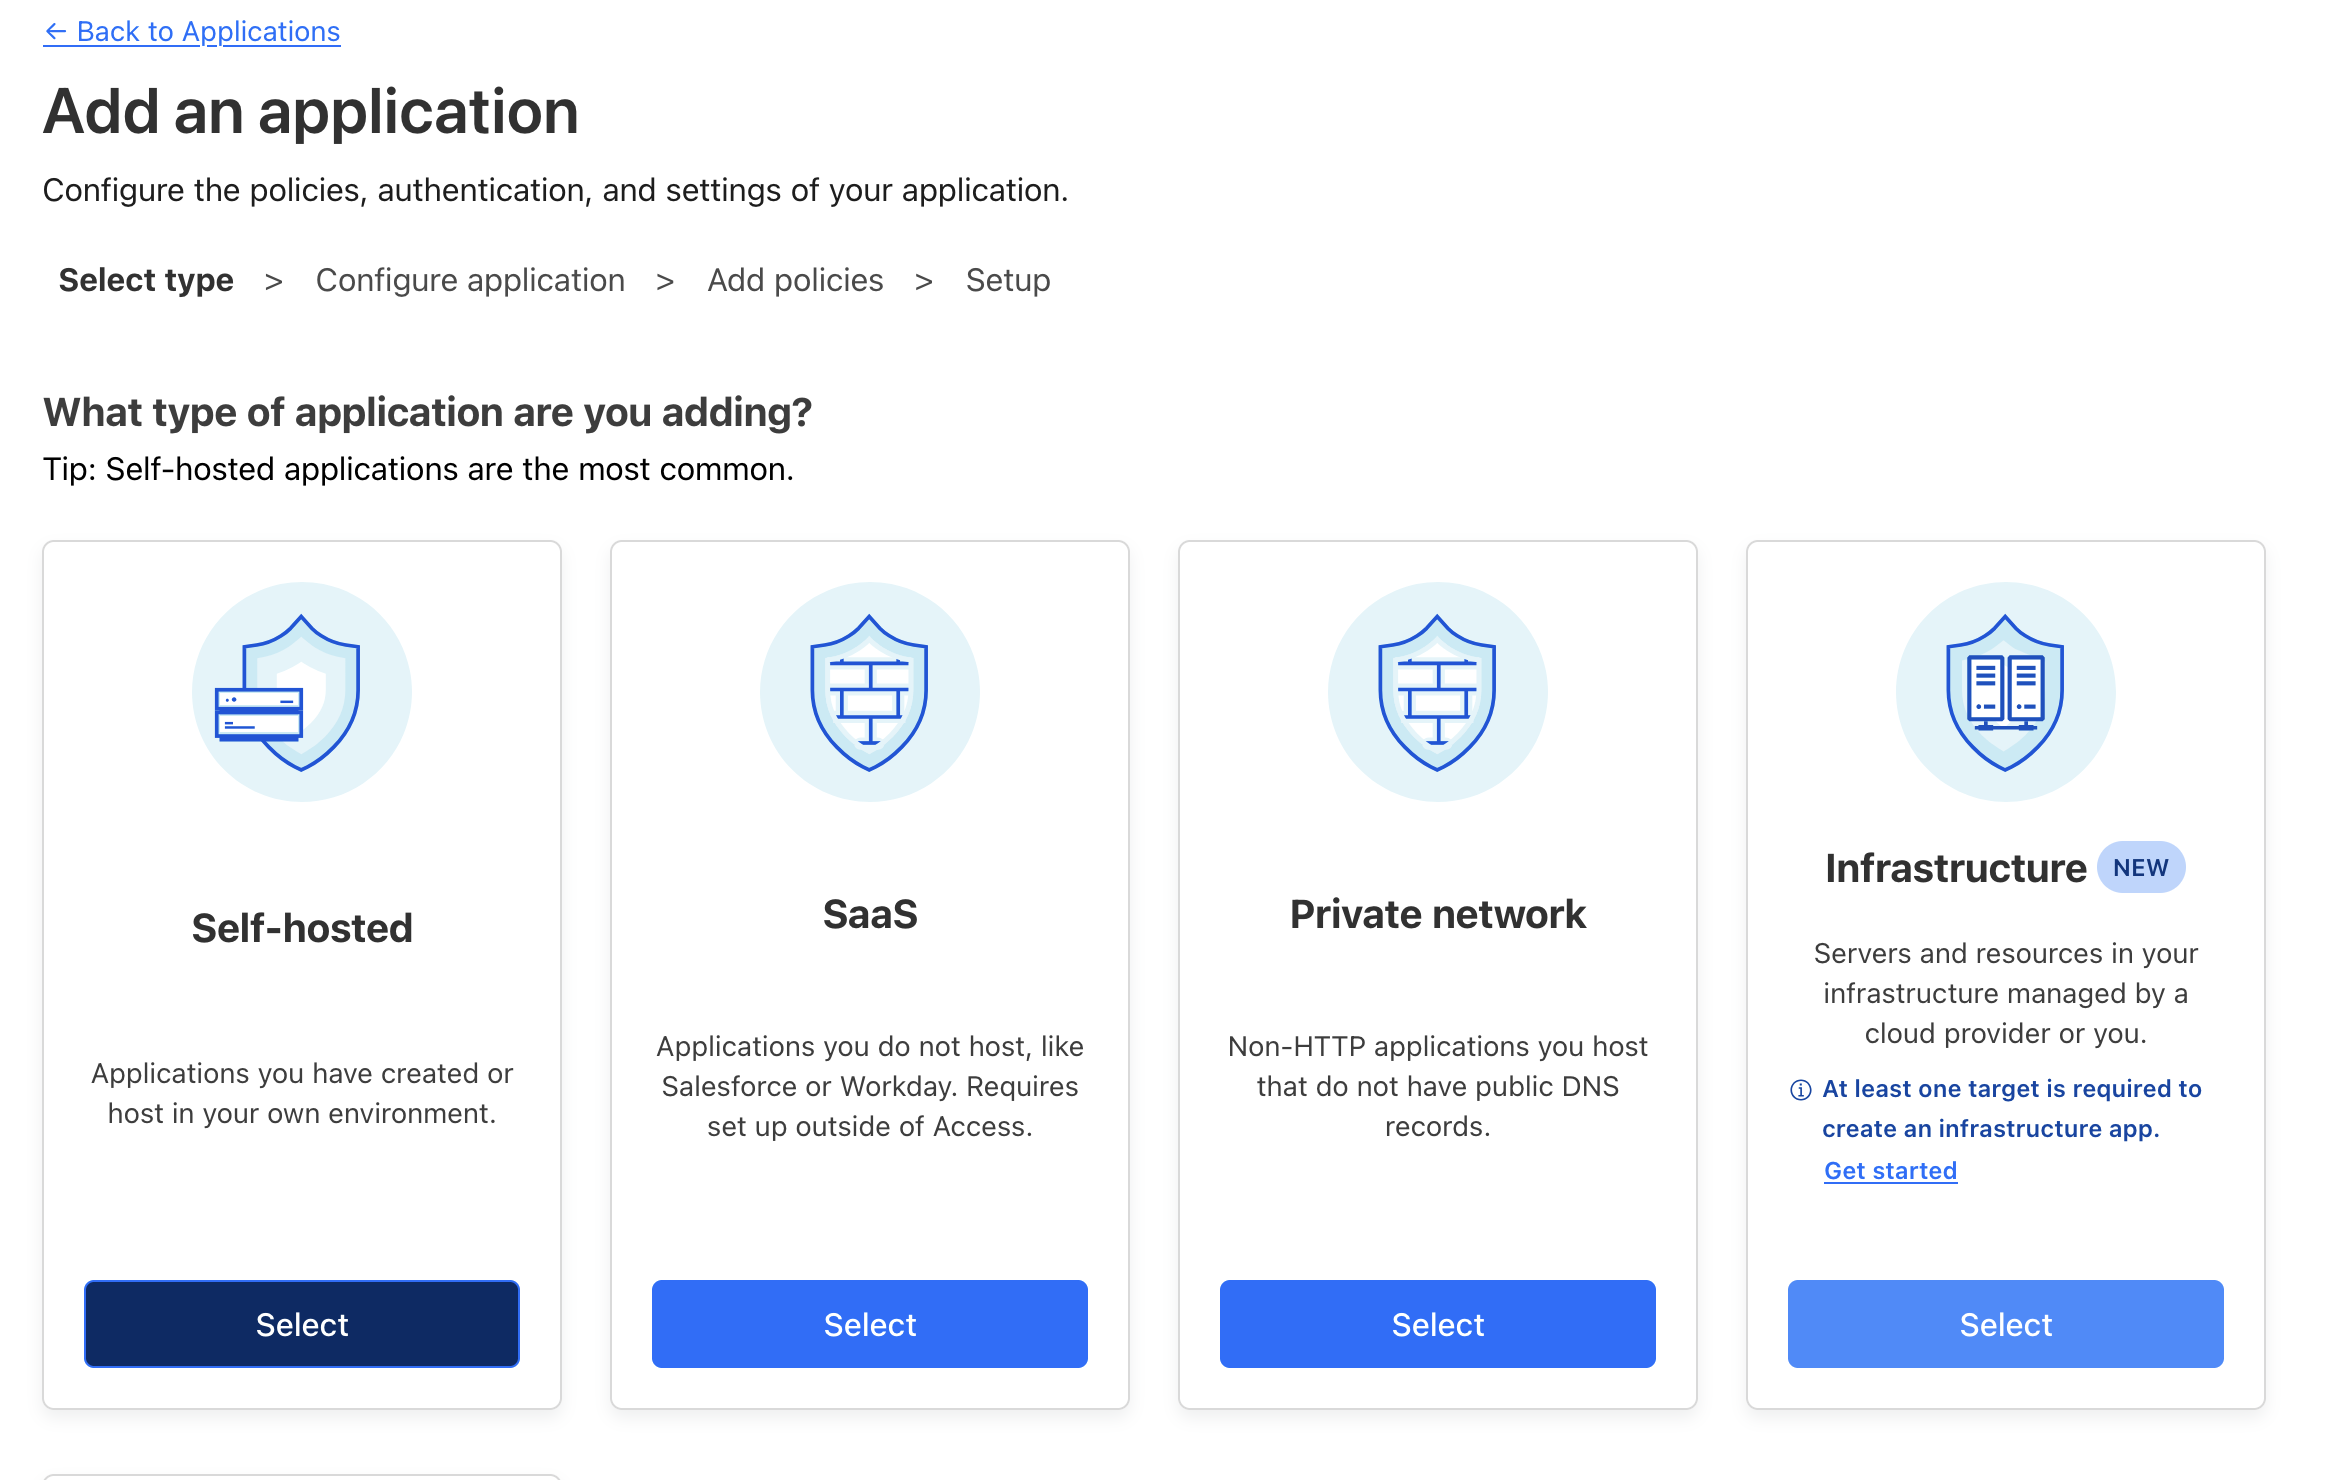
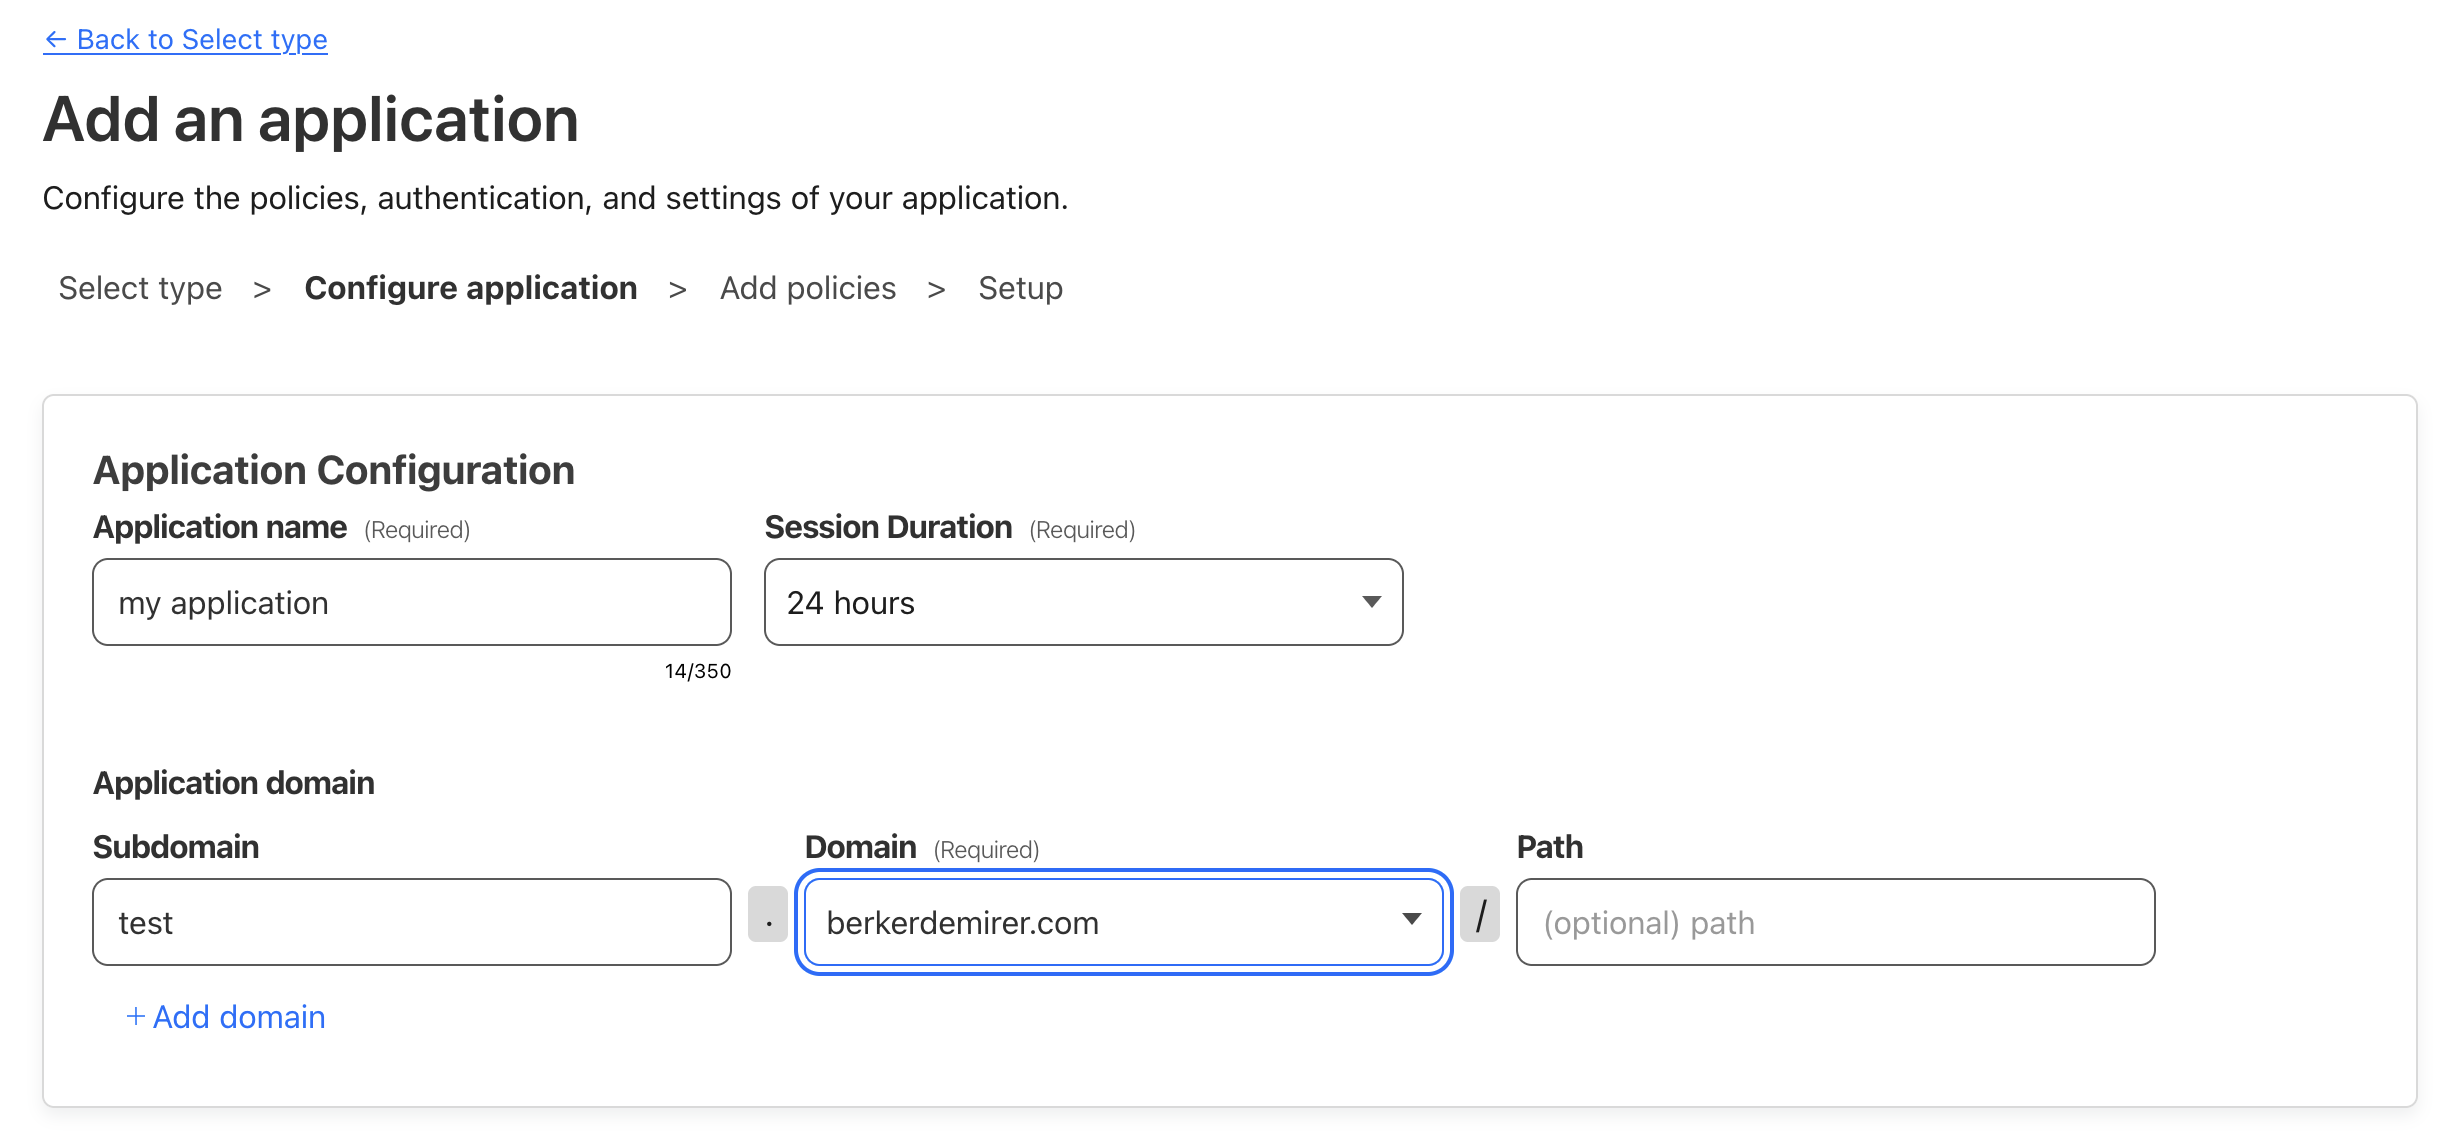
- Configure the application and domain
- Enable GitHub authentication
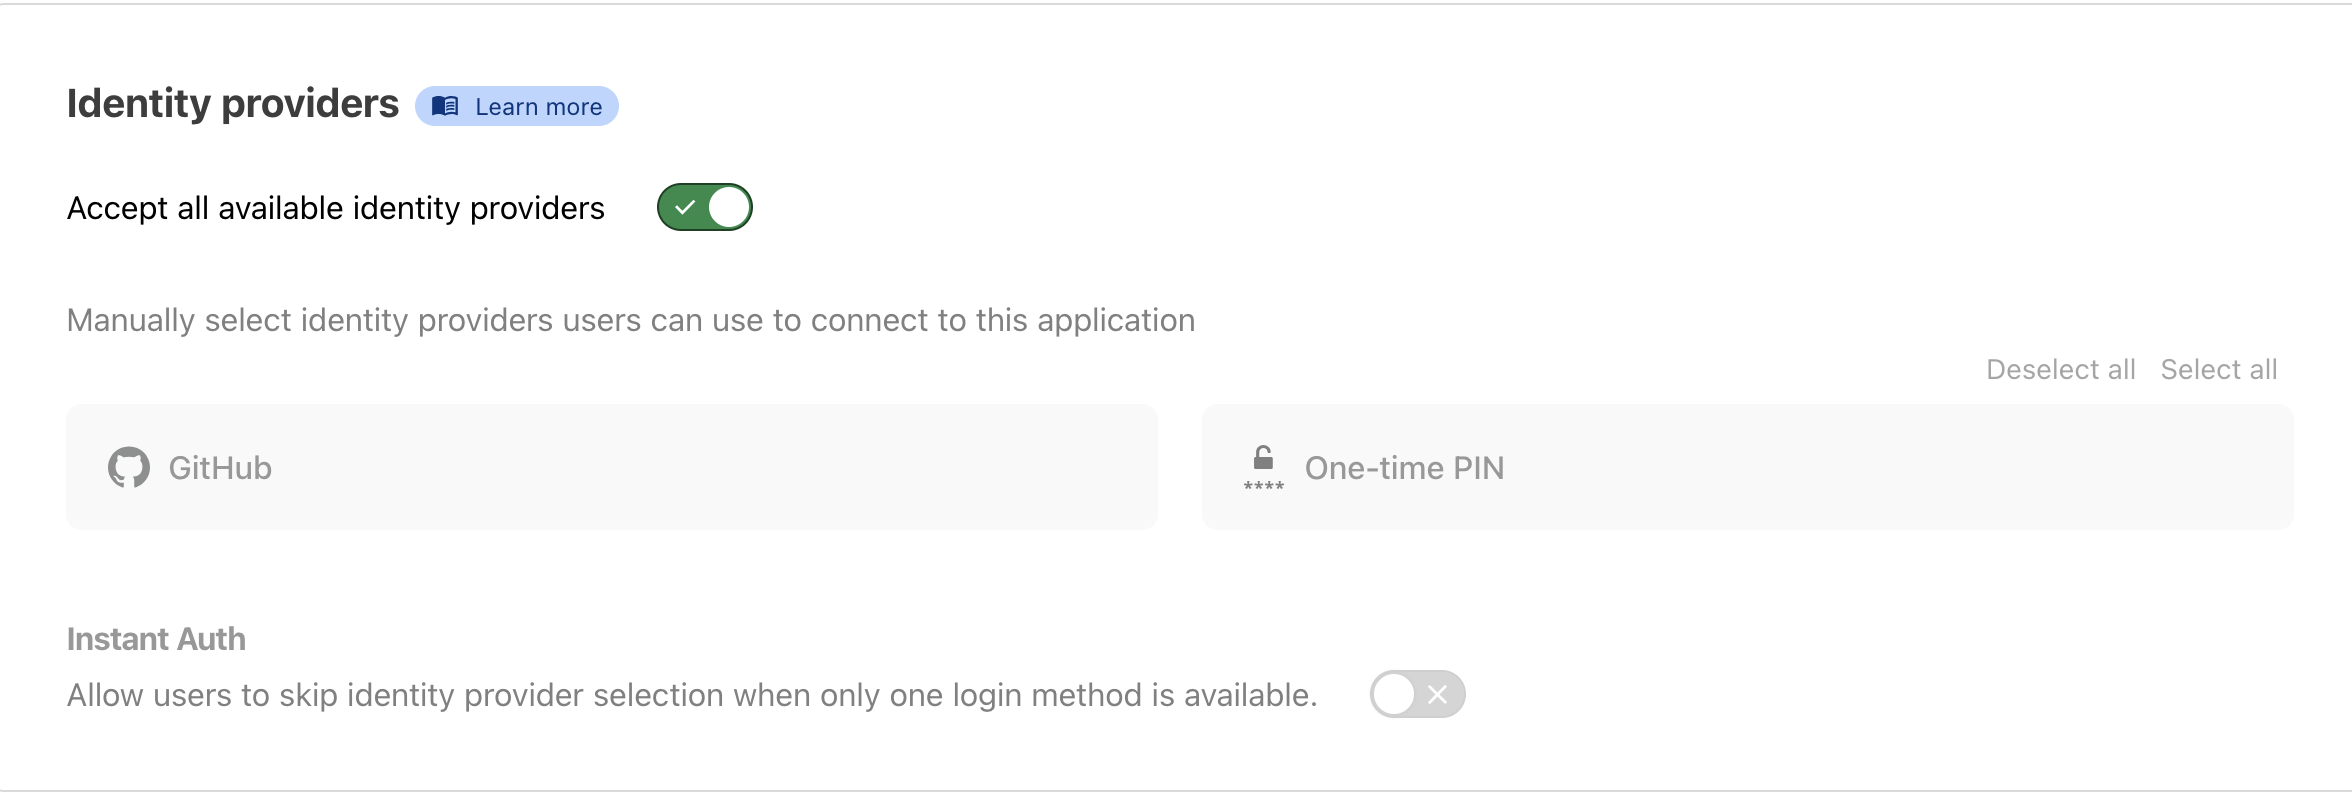
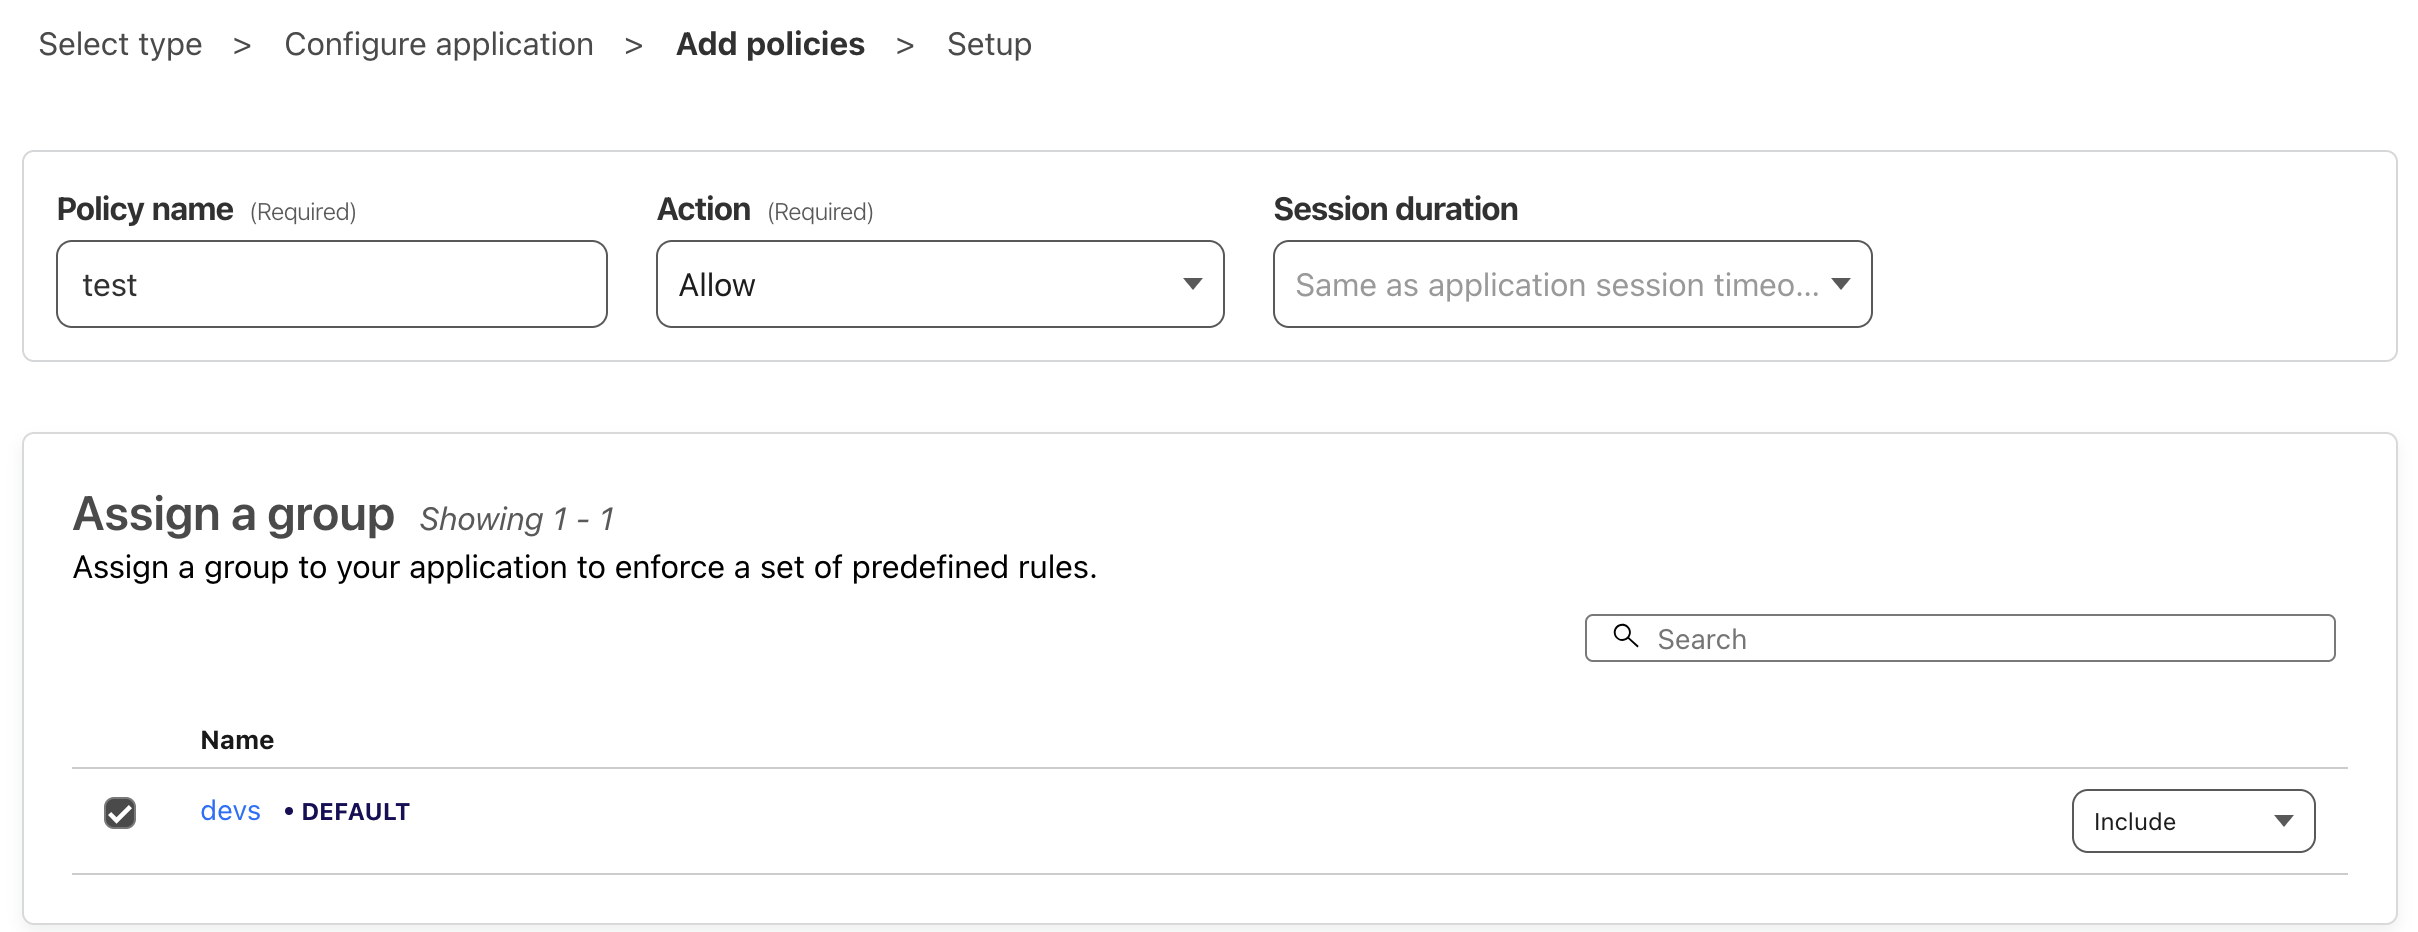
- Set up access policies
- Name your policy
- Optionally assign a group (recommended for granular access control)
- Configure any specific conditions, CORS settings, or cookie settings as needed
8.4 Testing Your Configuration
If everything is set up correctly, you should be able to access your application at https://subdomain.yourdomain.com and be prompted to authenticate with GitHub.